- What is Java?
- History of Java
- Features of Java
- Applications of Java
- Difference between JDK, JRE and JVM
- Installation of Java
- Setting up Java JDK Environment Path in Windows
- Java Hello World Program
- Variables
- Operators
- Primitive Data types in Java
- Conditional Statements
- Loops
- Branching Statements in Java
- Comment
- Java Class
- Object
- Constructor in Java
- Super
- This
- Static Keyword in Java
- Inheritance in Java
- Method Overloading in Java
- Method Overriding in Java
- Abstract class in Java
- Interface in Java
- Exception Handling in Java
- String
- Packages in Java
- Access Modifiers in Java
- Linked Lists
To date, Java is being used to develop many applications like Mobile and Web-based applications, Enterprise Applications, Big Data Technologies, etc. Java has seen significant growth over the years and has a bright future ahead. Without further ado, let’s begin with the Java Tutorial.
What is Java?
Java is a high-level, robust, and object-oriented programming language that was initially developed by Sun Microsystems (now a subsidiary of Oracle) in 1995.
It follows the principle of WORA (Write Once Run Anywhere) – you can run a java program as many times as you want on a Java supported platform after it is compiled. There is no need for recompilation.
A platform is any hardware or software environment where you can run your programs. Java is known as a platform because it has a runtime environment (JRE) and API.
Learn Java the right way! Our course teaches you essential programming skills, from coding basics to complex projects, setting you up for success in the tech industry.
Also you can learn free Java Programming Course in Hindi with Certificate
History of Java
- 1991: Java was first designed for the digital cable television industry
- It was initially known as the Green Team. It was designed by James Gosling and his team members, Mike Sheridan and Patrick Naughton
- Later it got renamed to Oak based on the Oaktree outside James Gosling’s Office
- 1995: Oak got changed to Java based on the island in Indonesia from which the team used to have coffee
- Java was included in Time magazine’s “Top Ten Best Product of 1995”
- 1996: JDK 1.0 got released
Let’s move forward to the next topic in this Java tutorial to discuss Java’s features and applications.
Features of Java
- Simplicity: It is very easy to learn as syntax is similar to previously existing languages like C and C++. It has removed complex and rarely used features, such as explicit pointers, operator overloading, etc.
- Object-oriented: Java is based on objects which imitate real-world problems. It supports four pillars of the object-oriented language, i.e., Inheritance, Polymorphism, Abstraction and Encapsulation.
- Platform Independent: It has its own virtual machine and converts the code into bytecode which can run on a Java supported platform.
- Portability: As Java is platform-independent, any Java bytecode written on one platform can easily be carried into another platform.
- Secured: Java is way more secured because it has its own box responsible for handling its execution. It does not support pointers and multiple inheritances, which can cause ambiguity or lead programs to crash.
- Robust: Java is robust, which means powerful because it has strong memory management, automatic garbage collection, exception handling, and type checking mechanism.
- Efficiency: It is much more efficient because it uses a JIT(Just In Time) compiler that basically utilises the best of 2 worlds, i.e., compiler and interpreter.
- Distributed: Java facilitates us to create distributed applications using RMI (Remote Method Invocation) and EJB (Enterprise Java Beans). Using these Java features, you could access files by calling the methods from any machine on the web. Internet Explorer is an example of a distributed application.
- Multi-threaded: Java supports thread, which basically allows multiple tasks to execute concurrently without occupying much memory.
- Dynamic: Java is a dynamic language that supports the dynamic loading of classes. Using Java, you can adapt to an evolving environment supporting dynamic memory allocation, reducing memory wastage and improving the application’s performance.
Mastering this logic is a 'survival skill' for any modern developer, much like keeping a clean and organized Excel dashboard for your business. If you want a clear, no-headache roadmap to master these essentials, check out our free Java Course. It ensures you have a rock-solid foundation before you tackle complex software architecture.
Also Read: Why is Java Platform Independent?
Applications of Java
According to Sun Microsystems, numerous devices currently run on Java. A few examples are as follows:
- Desktop Applications: Acrobat Reader, Media Player, Antivirus, etc.
- Web Applications: JSP, Spring, Hibernate, Servlet, Struts, etc.
- Mobile Applications: Android, Java ME, Kotlin, etc.
- Enterprise Applications: Banking Applications. EJB is used to create these applications.
- Big Data Technologies: Hadoop
- Testing: Selenium
- Scientific Applications: MATLAB
- Gaming Applications: 2D and 3D
- Embedded Systems
- Robotics
And the list goes on. Numerous applications currently exist and run on Java. Java turned out to be one of the widely used programming languages in today’s world. Working on projects based on Java will also help you understand the applications of Java.
Now, let’s head into the practical stuff and begin with the procedure to install Java on your system.
Difference between JDK, JRE and JVM
- JVM: Java Virtual Machine
- This is a virtual(abstract) machine that holds all java executions
- It doesn't exist in reality.
- It also manages heap memory, garbage collector, etc.
- JRE: Java Runtime environment
- It is responsible for running pre-compiled java programs
- It contains all files and libraries to facilitate the running of java code
- It can't help one in development.
- JDK: Java Development toolkit
- This is a software that helps one in the development of Java applications.
- It is basically JRE+Development tools
Installation of Java
Now that you have a basic understanding of Java, let’s move on to install Java in your system.
Step-1: You need to install Java JDK first. Open your search engine on your web browser and type “Java JDK download” in the search bar. Next, click on the “Java SE Downloads” link from Oracle, as shown below.
For easier access, click on this download link for Java JDK downloads.
You will be redirected to the official webpage of Java SE Downloads.
Step-2: Next, click on the “JDK Download” link to download Java SE Development Kit.
You will be redirected to the following page:
Step-3: As you can see in the above image, the latest Java SE version is 16. Now, scroll down to the downloads links of various platforms. You have Linux, macOS, and Windows. Choose the platform you are currently using. I use Windows, and I will demonstrate how to set up Java on your Windows platform.
As shown in the above image highlighted in red, click on the “Windows x64 Installer” download button to download the Java JDK for Windows. Accept the license agreement, and your file will be downloaded.
Step-4: Once the software is downloaded, open the file to run the setup. An installation wizard window will appear. Choose ‘Next’ to move further into the installation process.
Step-5: Now, you will be asked to choose the destination folder to install the software. If you don’t want to change the location, you can simply click on the ‘Next’ button. If you wish to change, simply click on the ‘Change’ button and choose your desired location. I recommend not to change because you need to set up an environment path variable for Java, which I will explain later in the next section.
Java will be installed on your computer. After the installation, the final window will appear as shown below:
Setting up Java JDK Environment Path in Windows
Setting up the JAVA environment path variable will install Java globally on your system, and you can work on Java programs anywhere across your computer or system.
Step-1: Open “Control Panel” and click on: System and Security > System > Advanced system settings. A window will pop up on your screen, as shown below:
Step-2: Under ‘System Variables’, select “Path” and click on the “Edit” button.
Step-3: Next, click on the ‘New’ button to add the Java JDK bin path, as shown below:
Step-4: Now, open the JDK folder where you’ve installed it and open the ‘bin’ folder.
Copy the above path and paste it into the path variable, and click ‘OK’, as shown below:
Step-5: Later, under ‘System Variables’, click ‘New’ and add the following path:
Now, click the ‘OK’ button. Java Home path is created. Now, click the ‘OK’ button, and the Java JDK path is successfully completed.
You can now execute your Java programs across your system. To verify whether Java is successfully installed or not, open your command prompt and type the following command:
java -version
You will get the Java version information displayed in the command prompt, as shown below:
Java Hello World Program
public class MyFirstCode {
	public static void main (String[] args) {
		//to print on console
System.out.println("Hello World!");
	}
}
- Everything bold is a keyword which are words with some fixed meaning
- ‘Class’ is used to declare class in Java
- ‘Public’ is an access modifier which allows visibility to all
- ‘Static’ doesn't need object to get called and main gets called by JVM
- ‘Void’ means that function will not return anything
Now, since we have some understanding of code, for running the code following are the steps:
- After setting up your environment, open cmd
- To compile, type javac MyFirstCode.java
- To run, type java MyFirstCode
This will print your output: Hello World!
To test the understanding more better, take Java Quiz.
Variables
- Variable is the name of a memory location where the data is stored.
- Syntax: datatype varname = val;
Example:
public class VariableDemo {
	public static void main (String[] args) {
		//var declaration and initialization
		int roll_num=23;
		String first_name="adam";

		//just declaration
		int marks;

		//later initialization
		marks=89;
System.out.println("Hi I am "+first_name+" roll_no "+roll_num+" and I scored "+marks);
	}
}
Output:
Hi I am adam rollno 23 and I scored 89
Naming Convention
- Variable names should begin with a letter, $, or an underscore(_)
- The first character can be then followed by any combination of letters or digits
- A variable name cannot be the same as any keyword as they are reserved for special purposes
- Variable names case sensitive
- Eg: valid- apple, _name, $address1
- Eg: invalid- 123apple, *roll, @email
There are 3 types of variables in Java
Instance variable
- Variable declared outside of any methods but within the class
- Can be accessed by the all the methods of class irrespective of its access specifier
- Every object of the class gets its own original copy of variable
Static Variable
- Also known as class variables
- Variables declared as static, maintains a single copy in memory and is shared by all the objects of the class
- They can be directly called using class name as classname.var_name
- Non-static methods can't access or manipulate static variables
Local variable
- Variables defined inside methods fall into this category.
- They are accessible in the scope where it is declared.
- They remain hidden outside of their methods.
Example:
class VariableDemo  {
	public static void main (String[] args) {
	    int i=100;//instance variable
        static int j=200;//static variable

        void method(){
        int k=300;//local variable
            }
      }
}
Operators
Unary operators
- It needs one operand
- We have 2 major operators here i.e, increment and decrement and each one have 2 variations of postfix and prefix
- Increment - to increase the value by 1
- postfix: first assign then increment
- prefix: first increment then assign
- Decrement - to decrease the value by 1
- postfix: first assign then decrement
- prefix: first decrement then assign
Example:
public class UnaryDemo {
	public static void main (String[] args) {
	    int a,b,c,d;
	    a=b=c=d=5;
	    a++;
	    ++b;
	    c--;
	    --d;
		System.out.println("a= "+a);
		System.out.println("b= "+b);
		System.out.println("c= "+c);
		System.out.println("d= "+d);
	}
}Output:
a= 6
b= 6
c= 4
d= 4
Arithmetic operators
- It comprises all binary arithmetic operations like add, subtract, multiply, divide etc.
- Another addition operator is modulus(%), which gives you the remainder.
Example:
public class ArithmeticDemo {
	public static void main (String[] args) {
	    int a,b,c,d;
	    a=6+5;
	    b=6-5;
	    c=6*5;
	    d=6/5;
		System.out.println("a= "+a);
		System.out.println("b= "+b);
		System.out.println("c= "+c);
		System.out.println("d= "+d);
	}
}
Output:
a= 11
b= 1
c= 30
d= 1
Shift operators
- Two variations - left and right shift
- left shift: shift bits in left direction for specified value
- right shift: shift bits in right direction for specified value
Example:
public class ShiftDemo {
	public static void main (String[] args) {
	    int a,b;
	    a=b=8;
	    a<<=2;
	    b>>=2;
		System.out.println("a= "+a);
		System.out.println("b= "+b);

	}
}
Output:
a= 32
b= 2
Relational operators
- It comprises operators for comparisons
- There are operators to check inequality i.e., < ,>, <=, >=
- For equality check, we have 2 operators i.e., == and !=
Example:
public class RelationalDemo {
	public static void main (String[] args) {
	    int a,b,c;
	    a=1;
	    b=2;
	    c=1;
		System.out.println("a<b "+ (a<b));
		System.out.println("a>b "+ (a>b));
		System.out.println("a<=b "+ (a<=b));
		System.out.println("a>=c "+ (a>=c));
	    System.out.println("a!=b "+ (a!=b));
		System.out.println("a==c "+ (a==c));
	}
}
Output:
a<b true
a>b false
a<=b true
a>=c true
a!=b true
a==c true
Bitwise operators
It computes by going bit by bit. Both sides are checked irrespective of what the first expression computes to. Four major bit operators are:
- & - bitwise and, which returns 1 if both bits are 1 else 0.
- | - bitwise or, which returns 1 if either of bits is 1 else 0.
- ^ - bitwise xor, which returns 1 if both bits are different else 0.
- ~ - bitwise not, which changes 1 to 0 and vice versa.
Example:
public class BitwiseDemo {
	public static void main (String[] args) {
	    int a,b;
	    a=1;
	    b=2;
		System.out.println("a&b  = "+ (a&b));
		System.out.println("a|b  = "+ (a|b));
		System.out.println("a^b  = "+ (a^b));
		System.out.println("~a  = "+ (~a));

	}
}
Output:
a&b = 0
a|b = 3
a^b = 3
~a = -2
Logical operators
These are used for conditions comparison that basically checks for the validity of them. They are also used in loops as part of termination conditions. If the first condition is enough to give the final verdict, it will not evaluate the second one.
There are 3 logical operators:
- && - logical AND, returns true when both conditions evaluate to true
- || - logical OR, returns true when either of the conditions evaluates to true
- ! - logical not, return true when the condition evaluates to false
Example:
public class LogicalDemo {
	public static void main (String[] args) {
	    int a,b;
	    a=1;
	    b=2;
		System.out.println("a==1 && b==1 "+ (a==1 && b==1));
		System.out.println("a==1 || b==1 "+ (a==1 || b==1));
		System.out.println("!a "+ !(a==1));

	}
}
Output:
a==1 && b==1 false
a==1 || b==1 true
!a false
Assignment operator
Assignment operator(=) is used to assign right-hand side value to the left-hand side variable.
Ternary operator(?:)
An alternative of if-else. Condition is placed before '?' and if evaluates to true then LHS of the colon gets executed else RHS of the colon will be executed.
Example:
public class MiscDemo {
	public static void main (String[] args) {
	    int a;
	    //assignment operator
	    a=1;
		System.out.println("(a==1?"expression is true":"expression is false" = n "+ (a==1?"expression is true":"expression is false"));


	}
}
Output:
(a==1?"expression is true":"expression is false" =
expression is true
Primitive Data types in Java
There are different types of data that one deals with in real life. To process them we need different types of containers or data types as storage. In java, there are 8 primitive data types:
- byte - size is 1 byte and by default, it holds 0
- int - size is 4 byte and by default, it holds 0
- short - size is 2 byte and by default, it holds 0
- long - size is 8 byte and by default it holds 0L
- char - size is 2 byte and by default, it holds 'u0000'
- boolean - size is 1 bit and by default it holds false
- float - size is 4 byte and by default it holds 0.0f
- double - size is 8 byte and by default, it holds 0.0d
There are also some non-primitive data types like arrays, classes such as String etc.
Conditional Statements
if-else
The if-else statement consists of 2 keywords, if and else. This is a way where there are 2 paths possible depending upon a condition. I.e., 'if' condition manipulates to true then it gets executed otherwise code 'else' will execute. You can multiple ‘else if’ followed by else if there are more possible paths. Also, nested if and else are possible.
Example:
public class IfElseDemo  {
	public static void main (String[] args) {
		int a=5,b=6;
		if(a+b==11)
		    System.out.println("equal");
		else
		    System.out.println("not equal");
	}
}
Output:
true
switch
It is an elegant way to replace multiple else-if
Syntax:
switch(expression)
{
    case val: ... ;
              break;
    case val: ... ;
              break;
    case val: ... ;
              break;
    default: ...;
}
Here depending upon the answer evaluated by the condition, case code gets executed. Every case must be followed by break unless it is required not to as per logic. Otherwise, all cases will start executing from the matched case till either break is encountered or all cases get exhausted.
‘default’ is optional and holds the code which should be executed if no catches get matched.
‘val’ can be integer, char or String in java.
Example:
public class SwitchDemo {
	public static void main (String[] args) {
		String day="sun";
		switch(day)
		{
		    case "mon": System.out.println("Today is monday");
		                   break;
		    case "tues": System.out.println("Today is tuesday");
		                   break;
		    case "wed": System.out.println("Today is wednesday");
		                   break;
		    case "thurs": System.out.println("Today is thursday");
		                   break;
		    case "fri": System.out.println("Today is friday");
		                   break;
		    case "sat": System.out.println("Today is saturday");
		                   break;
		    case "sun": System.out.println("Today is sunday");
		                   break;
		    default : System.out.println("day is invalid!");
		}
	}
}
Output:
Today is sunday
Loops
Three major loops are ‘for’, ‘while’, and ‘do while’
for loop java:
It is best to use when we know the specified number of times the code should execute.
Syntax:
for( initialization; termination; updation){
}- 'initialization' is used to initialize the variable, which is being used for iteration.
- 'termination' - comprises conditions which determine till when iteration will continue.
- 'updation' - how our variable will get updated.
Example:
public class ForDemo {
	public static void main (String[] args) {
		for(int i=0;i<5;i++)
		    System.out.println("current value of i : "+i);
	}
}
Output:
current value of i : 0
current value of i : 1
current value of i : 2
current value of i : 3
current value of i : 4
while loop java
It is best to use when we know the specified expression depending on whose value the code should execute.
Syntax:
while( expression ){
}
‘expression’ is used to dictate the condition who is responsible for loop continuation.
Example:
public class WhileDemo {
	public static void main (String[] args) {
		int i=0;
		while(i<5){
		    System.out.println("current value of i : "+i);
		    i++;
		}
	}
}
Output:
current value of i : 0
current value of i : 1
current value of i : 2
current value of i : 3
current value of i : 4
do-while loop java :
It is best to use when we know that at least code must execute once irrespective of the condition.
Syntax:
do{
}while( expression );
'expression' is used to dictate the condition who is responsible for loop continuation.
Example:
public class DoWhileDemo {
	public static void main (String[] args) {
		int i=0;
		do{
		    System.out.println("current value of i : "+i);
		    i++;
		}while(i<5);
	}
}
Output:
current value of i : 0
current value of i : 1
current value of i : 2
current value of i : 3
current value of i : 4
Branching Statements in Java
break
It is a keyword that basically terminates the current loop and moves execution out of the loop
for(.........){
break;
} ==>execution comes here when the break is encountered
Example:
public class BreakDemo {
	public static void main (String[] args) {
		int i=0;
		while(i<5){
		    System.out.println("current value of i : "+i);
		    i++;
		    if(i==3)
		        break;
		}

		System.out.println("Out of loop!");
	}
}
Output:
current value of i : 0
current value of i : 1
current value of i : 2
Out of loop!
continue
It is a keyword that basically terminates the current iteration and moves execution to the update part of the loop. In ‘while’ and ‘do-while’, when continue is encountered, it will ignore the rest of the code
for(.. ; .... ; ...)==>execution comes here when break is encountered
{
continue;
}
Example:
public class ContinueDemo {
	public static void main (String[] args) {
		for(int i=0;i<5;i++){

		    if(i==3)
		        continue;
		    System.out.println("current value of i : "+i);

		}

		System.out.println("Out of loop!");
	}
}
Output:
current value of i : 0
current value of i : 1
current value of i : 2
current value of i : 4
Out of loop!
return
It returns from its block of code i.e. if it is inside a function, it will exit from it.
main(.........){
return;
}
==>exists from the program
Example:
public class ReturnDemo {
	public static void main (String[] args) {
		for(int i=0;i<5;i++){

		    if(i==3)
		        return;
		    System.out.println("current value of i : "+i);

		}

		System.out.println("Out of loop!");
	}
}
Output:
current value of i : 0
current value of i : 1
current value of i : 2
Comment
Comments are used to give a brief description of what is the logic behind code. They are just ignored by the compiler at the time of execution.
In java, we have sing line and multi-line comments:
// - single line

and

/*
….
….
*/ - multi line
Java Class
It is a blueprint of a real-life entity and consists of the data and methods. Basically, it is the implementation of Encapsulation which is one of the OOPs pillars.
Keyword class is used to declare the class in java. As per naming convention, the class name follows that the first letter of every word should be in uppercase. Also, all code must be in some class and the single document can have multiple classes but only 1 public class
Example :
class Container{

//data members
     int weight;
    String color;
    double price;

//methods
    void setWeight(int w){
        weight=w;
    }
    void setColor(int c){
        color=c;
    }
    void setPrice(int p){
        price=p;
    }
    void print(){
        System.out.println(weight+" "+color+" "+price);
    }
}
Object
It is basically a physical entity of class, a class's instance. The new keyword is used to create objects and allocate memory in Heap. When we create an object, it calls for the constructor of a class.
Example:
Container c1=new Container();
Constructor in Java
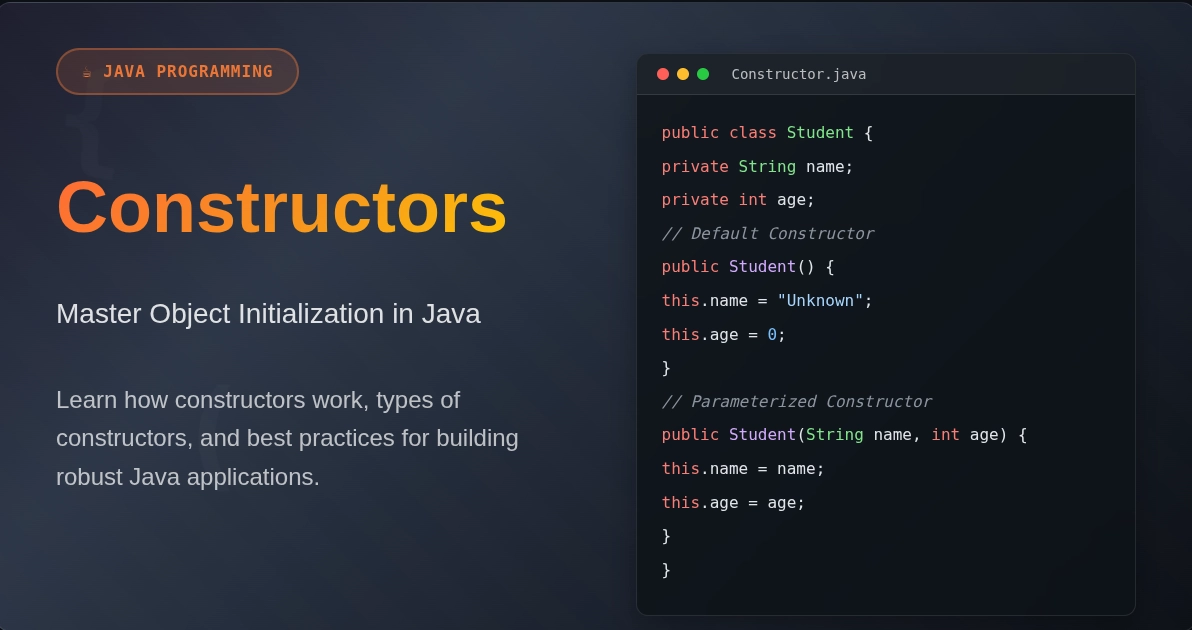
The constructor is a special method that is used to allocate memory and initialize objects. It doesn't have any return type and its name is same as of its class name. The compiler implicitly provides a default constructor to allocate the memory if no constructor is explicitly defined.
Constructor having parameters are categorised as parameterised constructor. When new is encountered, it calls for the constructor. Parameters passed at the time of the creation of the object determines which constructor should be called.
Example:
class Container{
    int weight;
    String color;
    double price;

    //parameterized constructor
    Container(int w,String c,double p)
    {
        weight=w;
        color=c;
        price=p;
        System.out.println("I am a parameterized constructor");
    }

    //default constructor
    Container()
    {
        System.out.println("I am a default constructor");
    }

    void print(){
        System.out.println(weight+" "+color+" "+price);
    }
}
public class ConstructorDemo {
	public static void main (String[] args) {
	    Container c1=new Container();
	    Container c2=new Container(10,"red",567.85);
	    c1.print();
	    c2.print();
	}
}
Output:
I am a default constructor
I am a parameterized constructor
0 null 0.0
10 red 567.85
Super
‘Super’ is generally associated with parent class. It extends keyword used for an inheritance that will establish a child-parent relationship. You can call parent's method, data members and constructor using super. While calling the parent's constructor using super, it should be the 1st line in the code block
This
‘This’ is generally associated with the current class. You can call current class method, data members and constructor using this. While calling the current class constructor using this, it should be the 1st line in the code block.
Example:
//parent class
class Hostel{
    String address;
    String name;

    //parameterized constructor to initialize add and name
    Hostel(String address,String name){
        /*
            using this to point to the Hotel's address and name
            if there is no this, the parameter will assign values to local var and the class var will still have default values.
        */
        this.address=address;
        this.name=name;
    }

    //parameterized constructor to initialize just name
    Hostel(String name){
        this.name=name;
    }

    //method to print address
    void printAddress(){
        System.out.println("address : "+address);
    }

}

//child class
class Room extends Hostel{
    int number;
    String name;

    //parameterized constructor to initialize address, name and number
    Room(String address,String name,int number){
        super(name); //calling parent's constructor
        this.address=address;
        this.name=name;
        this.number=number;
    }

    //method to print all details of room
    void printRoomDetails(){
        System.out.println("name : "+name);
        super.printAddress();
        System.out.println("room no. : "+number);
    }
}

class Demo {
	public static void main (String[] args) {
	    Room r1=new Room("12th street,NY","CS Block ",43);
	    r1.printRoomDetails();
	}
}
Output:
name : CS Block
address : 12th street,NY
room no. : 43
Static Keyword in Java
Keyword
Keywords are otherwise known as reserved words, which represents predefined actions. Keywords are mainly used for some internal process. We cannot use keywords as objects and variable name as well. In such a case, if we use keywords as objects or variable name, we will get a compile-time error. There are many types of keywords. We will see about static keywords in this blog.
Static keyword
A static keyword is one of the types of keywords. A static keyword represents a member that belongs to a particular type itself, not to an instance of that type.
This means a single instance is created for the static member and used for all instance of the class.
A keyword can be created for methods, variables, blocks and also for nested class.
Static variable
- If any variable is used as static, then the variable is known as a static variable.
- If any variable is used to indicate an object’s common property, then the variable is a static variable.
- For example: country for population, city name for customers, etc.
- It is mainly used to manage memory.
- It is used when the variable is independent and common for all objects.
Points to note
- The class contains static variables; hence, using the class name it can be accessed does not require a reference of the object.
- At the class level, static variable can be declared.
- It does not need any object initiation to access.
Syntax
static data_type variable_name;
Example of static variable keyword
class numbers
{
   static int count=0;
   public void increment()
   {
       count++;
   }
   public static void main(String args[])
   {
       numbers obj1=new numbers();
       numbers obj2=new numbers();
       obj1.increment();
       obj2.increment();
       System.out.println("Obj1: count is="+obj1.count);
       System.out.println("Obj2: count is="+obj2.count);
   }
}
Output
Obj1: count is=2
Obj2: count is=2
As shown in the above illustration, both objects contain the same variable objects.
Static method
- We can use a static keyword for methods to use such method as static method.
- We can use the static method for the class, not for objects in a class.
- A static method can use a static data member and can change the value of a static data member.
- Without creating an instance of the class, we can create a static method
- The major advantage of the static method is it does not require an object.
Points to note:
- We cannot override the static method because it is compiled at runtime.
- We cannot make the abstract method static.
- It does not use superkeys.
- The static method needs the reference of objects to access instance variable and methods directly.
- It can access all static variable and also other static methods as well.
Syntax
<class-name>.<method-name>
Example of static method
public class mall{
   public static void main(String args[]){
     customer c1 = new customer();
     c1.showData();
     customer c2 = new customer();
     c2.showData();
     //customer.b++;
     //c1.showData();
  }
}

class Customer {
int a; //initialized to zero
static int b; //initialized to zero only when class is loaded not for each object created.

  Customer(){
   //Constructor incrementing static variable b
   b++;
  }

   public void showData(){
      System.out.println("Value of a = "+a);
      System.out.println("Value of b = "+b);
   }
//public static void increment(){
//a++;
//}

}
Static block
- To initialize a static data member static block is used.
- At the time of class loading, it is executed before the main method.
- A static block is nothing but a block of statement inside the class.
- If the initialization of the static block is an error, it requires exception handling.
Points to remember:
- A single class may contain many static blocks.
- Static variable and static block should maintain the same order as they are present in class.
Example of a static block
public class number {
 static int i;
 static int j;
// static block
 static {
    i = 50;
    j = 100;
 }
 public static void main(String args[]) {


  system.out.println(“static block initialized”);
  System.out.println("Value of i = " + i);
  System.out.println("Value of j = " + j);

 	}
}
Static class
If a class is a nested class only then, we can convert it into a static class. It does not require an outer class reference. Hence non-static member of the outer class cannot be accessed by a static class.
Points to note:
- Static class can be accessed by reference to an object.
- We cannot use the top-level class as a static class; hence only nested class can be converted into static.
Example of static class
// Java program to demonstrate how to
// implement static classes in java program

class OuterClass {
    private static String msg = "Great Learning";

    // Static nested class
    public static class NestedClass {

        // Only static members of Outer class
        // is directly accessible in nested
        // static class
        public void print()
        {

            // Try making 'message' a non-static
            // variable, there will be compiler error
            System.out.println(
                "Message from nested static class: "
                + msg);
        }
    }
Inheritance in Java
One of the very important pillars of OOPs, it facilitates the reusability of code as a child can inherit from the parent. Child can also implement additional data members or methods of its own. This is a IS-A relationship between child and parent.
Example: We did this in the above example where Room(child) inherits from Hostel(parent).
Java doesn't suppose classic multiple inheritances due to ambiguity that it may cause. But you can have multiple inheritance via interfaces.
Method Overloading in Java
This basically is a compile-time polymorphism. There can be multiple methods with the same name but different parameters list which may differ in types or number of arguments
‘Method’ cannot be overloaded by just changing the return type of methods.It provides an ease to the programmer and helps in the understanding of code
Example:
public class OverloadingDemo {

    int multiply(int a,int b){
        return a*b;
    }

    //overloaded multiply with 3 parameters
    int multiply(int a,int b,int c){
        return a*b*c;
    }

    //overloaded multiply with 2 parameters of different type
    double multiply(int a,double b){
        return a*b;
    }

	public static void main (String[] args) {
	    OverloadingDemo ob=new OverloadingDemo();
		System.out.println(ob.multiply(3,5));
		System.out.println(ob.multiply(3,5,3));
		System.out.println(ob.multiply(3,5.5));
	}
}
Output:
15
45
16.5
Method Overriding in Java
This is runtime polymorphism. Here if a child class wants to override parent's method i.e., wants to give its own implementation then it can do that by having exactly the same signature with its implementation.
Example:
class Parent{
    void hobbies()
    {
        System.out.println("Reading Books");
    }
}

class Child extends Parent{

    //same method as of parent but different implementation
    void hobbies()
    {
        System.out.println("Travelling");
    }
}


class OverridingDemo {
	public static void main (String[] args) {
		Child ob=new Child();
		ob.hobbies();
	}
}
Output:
Travelling
Abstract class in Java
If a method doesn't have its implementation then it is known as ‘abstract’ method. A class having 1 or more abstract methods is known as an abstract class. It actually implements OOPs abstraction to a certain extent
Abstract keyword is used for declaring abstract class. An abstract class can have abstract and non-abstract methods and it can't be instantiated.
Rather it has to be extended and abstract methods have to be given their implementation.
Example:
abstract class Keyboard{
    abstract void working();
    void name(){
        System.out.println("This is Keyboard component");
    }
}

class Hp extends Keyboard{
    //implementing abstract method
    void working(){
        System.out.println("This is hp Keyboard");
    }

}
public class AbstractClassDemo {
	public static void main (String[] args) {
		Hp ob=new Hp();
		ob.working();
		ob.name();
	}
}
Output:
This is hp Keyboard
This is Keyboard component
Interface in Java
It enforces 100% abstraction. Here all methods are abstract by default and thus it is not necessary to write abstract keyword while declaring them
Example:
interface Toy{
    void start();
    void run();
}

class Car implements Toy{
    public void start(){
        System.out.println("car started");
    }

    public void run(){
        System.out.println("car running");
    }
}
class InterfaceDemo {
	public static void main (String[] args) {
		Car ob=new Car();
		ob.start();
		ob.run();
	}
}
Output:
car started
car running
Compiler implicitly adds a public abstract in front of every method of the interface
T:>javap Toy
Compiled from "GFG.java"
interface Toy{
    public abstract void start();
    public abstract void run();
- implements keyword is used by the class that wants to use it and has to give a definition for every method
- While implementing interface methods, specifying public access modifiers is must
- A class can implement multiple interfaces which enable a sort of multiple inheritances
Exception Handling in Java
An exception is an abnormal condition that may happen at runtime and disturb the normal flow of the program. So we can handle exceptions in order to ensure our code gets executed normally
There are 2 major category of exception
- Checked
- Those exception that are checked at compile-time comprises of checked exception
- They are child classes of Exception except RuntimeException
- Example: IOException, ClassNotFoundException etc.
- Unchecked
- Those exception that are checked at runtime comprises of unchecked exception
- They are child classes of RuntimeException.
- Example: ArithmeticException, NullPointerException etc.
Basic syntax:
try{

}catch(Exception e){

}- There are 5 keywords in Java exception handling:
- try
- catch
- finally
- throw
- throws
- ‘try’ block contains the code that might throw an exception. Don't write anything extra in try as statements after the exception will not get executed if the exception occurred
- ‘catch’ block is used to catch the exception thrown by statements in the try block. It must follow try else it will give a compile-time error.
Example:
public class ExceptionDemo {
	public static void main (String[] args) {
		int a=10;
		for(int i=3;i>=0;i--)
		   try{
		     System.out.println(a/i);
		   }catch(ArithmeticException e){
		       System.out.println(e);
		   }
	}
}
Output:
3
5
10
java.lang.ArithmeticException: / by zero
There can be multiple catch, which should be placed from child to parent in order to get the desired output. finally block contains code that must be executed no matter if an exception is thrown or not. finally generally contains code of file release, memory cleaning etc.
Exception:
public class ExceptionDemo {
	static void canVote(int age){
		if(age<18)
            try{
                throw new Exception();
            }catch(Exception e){
                System.out.println("you are not an adult!");
            }
		else
		   System.out.println("you can vote!");
	}
	public static void main (String[] args) {
		canVote(20);
		canVote(10);
	}
}
Output:
5
I am finally
throw keyword is used to explicitly throw an exception which normally doesn't throw an exception.
Exception:
public class ExceptionDemo {
	static void canVote(int age){
		if(age<18)
            try{
                throw new Exception();
            }catch(Exception e){
                System.out.println("you are not an adult!");
            }
		else
		   System.out.println("you can vote!");
	}
	public static void main (String[] args) {
		canVote(20);
		canVote(10);
	}
}
Output:
you can vote!
you are not an adult!
throws basically say what sort of exception the code can throw and relies on the caller to handle it
Example:
public class ExceptionDemo {
	static void func(int a) throws Exception{
		   System.out.println(10/a);
	}
	public static void main (String[] args) {
		try{
		    func(10);
		    func(0);
		}catch(Exception e){
		   System.out.println("can't divide by zero");
		}

	}
}
Output:
1
can't divide by zero
String
A string is a sequence of characters. It's a class in java and there are 2 ways to create a string:
- String str = "hello";
- String str = new String("hello");
We have special memory termed as string constant pool inside heap and,
- In the first way, a copy is created in heap and in SCP too if it was not already there
- In the second way, copy is created in heap only
String can also be created using char array
- char[] ch={'h','e','l','l','o'};
- String str=new String(ch);
String is immutable that means once created it cannot be manipulated
There are three ways to check for equality in String:
- == : checks for same reference
- .equals() : checks for same content
- .compareTo() : compares content lexicographically
- return +ve num : str1>str2
- return -ve num : str1<str2
- return 0 : str1==str2
Example:
public class StringDemo {
	public static void main (String[] args) {
		String s1=new String("cat");
		String s2="cat";
		String s3="cat";
		System.out.println(s1==s2);
		System.out.println(s2==s3);
		System.out.println(s1==s3);
		System.out.println(s1.equals(s3));
		System.out.println(s1.compareTo(s2));
	}
}
Output:
false
true
false
true
0
String has many methods that help in working with strings. Some of them are:
- length()
- toUpperCase()
- toLowerCase()
- contains()
- indexOf()
- substring()
- split()
- replace()
public class StringDemo {
	public static void main (String[] args) {
	    String str="Today is monday.";
		System.out.println(str.length());
		System.out.println(str.toLowerCase());
		System.out.println(str.toUpperCase());
		System.out.println(str.contains("is monday"));
		System.out.println(str.indexOf("monday"));
		System.out.println(str.substring(4,8));
		System.out.println(str.replace("monday","tuesday"));
	}
}
Output:
16
today is monday.
TODAY IS MONDAY.
true
9
y is
Today is tuesday.
For mutable String, java does have 2 more classes
- StringBuilder (non synchronized i.e, not thread-safe)
- StringBuffer (synchronized i.e, thread-safe)
Packages in Java
A package in Java is used to group or organize a collection of similar classes and interfaces. It provides access protection and namespace management.
In simpler terms, it is just like a folder or directory on your system. It helps to avoid name conflicts and write better code for easier maintainability.
Java provides you with a wide range of packages in a class library. This library is called the Application Program Interface (API).
There are two types of Packages in Java:
- Built-in Packages: These packages contain numerous classes that are part of Java API. Some widely used packages are:
- java.lang: Language support classes like mathematical operations.
- java.io: Input and Output operations.
- java.util: Utility classes like data structures, date/time operations, etc.
- java.applet: Used to create applets.
- java.awt: It consists of classes that are used to implement GUI components like menus, buttons, etc.
- java.net: Networking operations.
There are other numerous built-in packages in Java. You can use them as per your program choice.
User-defined Packages: The user, i.e., you, can define these packages. We use the “package” keyword to create a package. Let’s see a simple example to understand the working of packages.
//Save as PackageDemo.java
package myfirstpack;
public class PackageDemo {
 public static void main(String args[]) {
    System.out.println("This is my package.");
   }
}
Now, open cmd and type the following command to compile:
javac -d . PackageDemo.java
The above command forces the compiler to create the “myfirstpack” package. The “-d” keyword describes the destination for saving the generated class file. You can use dot (.) to keep the package within the same directory.
Next, type the following command to run your package:
java myfirstpack.PackageDemo
Output: This is my package.
Access Modifiers in Java
An access modifier determines the accessibility or scope of a class, constructor, fields, variables, or methods. There are four types of access modifiers in Java:
- Public
- Protected
- Default - There is no keyword necessary
- Private
Let’s look at a table on how access modifiers work with classes and packages.
| Access Modifier | Same Class | Same Package | Outside Package by Subclass Only | Outside Package |
| Public | Yes | Yes | Yes | Yes |
| Protected | Yes | Yes | Yes | No |
| Default | Yes | Yes | No | No |
| Private | Yes | No | No | No |
- Public Access Modifier
This modifier has the most comprehensive scope among the other access modifiers that are accessible anywhere in the program.
Example:
Write the following code in the A.java file.
package firstpack;
public class A {
    public void msg_display() {
        System.out.println("Great Learning");
    }
}
Write the following code in the B.java file.
package secondpack;
import firstpack.*;
class B {
    public static void main(String args[]) {
        A ob = new A();
        ob.msg_display();
    }
}
Now, run the following commands one after another to produce the output.
javac -d . A.java
javac -d . B.java
java secondpack.B
Output: Great Learning
2. Protected Access Modifier
These access modifiers are accessible within the same package or subclasses in different packages, which can be applied to data members, methods, and constructors.
Example:
Write the following code in the A.java file.
package firstpack;
public class A {
    protected void msg_display() {
        System.out.println("Great Learning");
    }
}
Write the following code in the B.java file.
package secondpack;
import firstpack.*;

class B extends A {
    public static void main(String args[]) {
        B ob = new B();
        ob.msg_display();
    }
}
Now, run the following commands one after another to produce the output.
- javac -d . A.java
- javac -d . B.java
- java secondpack.B
Output: Great Learning
3. Default Access Modifier
If no modifier is defined to a class, method, or data member, it takes the default access modifier. These modifiers are accessible only within the same package and not from outside the package.
Example:
Write the following code in the A.java file.
package firstpack;
class A {
    void msg_display() {
        System.out.println("Great Learning");
    }
}
Write the following code in the B.java file.
package secondpack;
import firstpack.*;
class B {
    public static void main(String args[]) {
        A ob = new A();  //Compile Time Error
        ob.msg_display();  //Compile Time Error
    }
}
Now, run the following commands one after another to produce the output.
- javac -d . A.java
- javac -d . B.java
You will get compile-time errors as the scope of class A and method msg_display() is set to default, which cannot be accessed from outside the package.
4. Private Access Modifier
These modifiers are accessible only within the same class where they are declared. Any other class of the same package cannot access these members.
Example:
We will create two classes, A and B, within the same “firstpack” package. Next, specify the scope of a method in class A as private and try to access this method from class B. Now, see the output produced.
Write the following code in the A.java file.
package firstpack;
class A {
    private void msg_display() {
        System.out.println("Great Learning");
    }
}

class B {
    public static void main(String ags[]) {
        A ob = new A();
        // Trying to access private method "msg_display()" of class B
        ob.msg_display();
    }
}
Now, run the following command to check the output:
javac -d . A.java
Output:
error: msg_display() has private access in A
ob.msg_display();
Linked Lists
What are Linked Lists?
A Linked list is a collection of nodes attached linearly. You can imagine a train; for example, there are different train compartments, and all of them are connected. Similarly, in a linked list, various nodes consist of the next node’s data and memory location. Due to the presence of memory location, the nodes are said to be attached.
Linked lists are linear data structures. They are used when we need to insert or delete data at the starting, ending or middle of the linked list. The process of adding and deleting data is simple in a linked list. We need not specify the size of the linked list at the time of creating it. The nodes are created anywhere there is free memory.
How do Linked Lists function in Java?
In C language, we use pointers to point to the memory location of the next node. The nodes are not necessarily present side by side. We can access them through the address pointers. Thus, the nodes are connected to one another. Jumping from one node to another node using memory locations is known as Pointer hopping.
For instance, consider that the first node, known as 'Head', would be present in the address, let's say 50001, and my next node is at memory location 100010. This address is stored in the node along with the data. Thus we can access the second node using its address 100010.
In Java, however, there are no pointers. Thus we use references to refer to the address of the next node. Here, Jumping from one node to another using memory locations is known as link-hopping.
But we need not declare any variable or a reference for now because the linked list is a part of the collection framework in the Java.util package.
Creation of Linked List in Java:
To create a linked list in Java, as stated earlier, we use the Java.util package and declare an object for the Linked List class. Then we can keep on adding and removing elements as the methods are built-in with the class LinkedList.
Example: Creating a linked list in java for storing prime numbers until 10.
import java.util.*;
 public class PrimeNumbers {

    public static void main(String args[])
    {
        // object of the class linked list is created
        LinkedList<Integer> lk = new LinkedList<Integer>();
       // Adding prime numbers to the linked list
        lk.add(2);
        lk.add(3);
        lk.add(5);
        lk.add(7);

        System.out.println(lk);
   }
}
OUTPUT:
[2, 3, 5, 7]
Adding Elements to Linked List:
We can add different elements at the start, end and middle of the list. For example, I want to prepare a linked list for students in a class based on their initials. I add them to the list using add() method. If I need to add new students, I specify the specific index in the list and their name and easily add them. Index starts from 0 in a linked list.
Example: A program to create a linked list in java for students in a class based on their initials.
import java.util.*;
   public class AddElements {
  public static void main(String args[])
    {
        LinkedList<String> lk = new LinkedList<String>();

        lk.add("Bindu");
        lk.add("Deepak");
        lk.add("Krithika");
        //add names with respect to index
       lk.add(2,"Gagan");
       lk.addFirst("Ankitha");

        System.out.println(lk);
    }
}
OUTPUT:
[Ankitha, Bindu, Deepak, Gagan, Krithika]
Changing Elements in a Linked List:
We can change the inserted elements in the list too, and it can be done using the set() method. Every linked list is indexed. Thus the element which we wish to change is to be referenced by the index of it. Therefore, this method takes an index and the element we want to insert now at that index. For instance, a student's name was entered wrong and needed to be corrected, so the student name’s index and the correct name will be taken in the set() method.
Example: A program to create a linked list in java for students in a class based on their initials.
import java.util.*;
   public class UpdateElements {
  public static void main(String args[])
    {
        LinkedList<String> lk = new LinkedList<String>();

        lk.add("Bindu");
        lk.add("Deepak");
        lk.add("Krithika");
        //add names with respect to index
       lk.add(2,"Gagan");
       lk.addFirst("Ankitha");
       System.out.println(lk);

       // set the updated element using index
      lk.set(0,"Anitha");

      System.out.println(lk);
    }
}
OUTPUT:
[Ankitha, Bindu, Deepak, Gagan, Krithika]
[Anitha, Bindu, Deepak, Gagan, Krithika]
Removing Elements in Linked list:
We can also remove different elements at the start, end and middle of the list. For example, Consider the student list in the example before. If some students left the class, then we have to remove their names. We can remove their names using their indexes or names themselves. We use the remove() method to remove elements in Linked lists.
Example: A program to create a linked list in Java to remove students from the list based on their initials.
import java.util.*;
   public class RemoveElements {
  public static void main(String args[])
    {
        LinkedList<String> lk = new LinkedList<String>();

        lk.add("Bindu");
        lk.add("Deepak");
        lk.add("Krithika");
        //add names with respect to index
       lk.add(2,"Gagan");
       lk.addFirst("Anitha");
       System.out.println(lk);
       lk.remove(1);
      System.out.println(lk);
      lk.remove("Gagan");
     System.out.println(lk);
    }
}
OUTPUT:
[Anitha, Bindu, Deepak, Gagan, Krithika]
[Anitha, Deepak, Gagan, Krithika]
[Anitha, Deepak, Krithika]
Other methods present in the LinkedList class include,
1. clear()- This method clears all elements in the linked list.
2. clone() -This method returns the exact copy of the linked list.
3. contains(Object O) - This method scans the list and returns 'True' if the element is present and 'False' if the given element is not present.
4. get(int index_value) - This method goes to the index given and returns the element present. The variations of this method are getFirst(), which returns the first element of the list, and getLast() which, returns the last element.
5. indexOf(Object o)- This method takes the object that is the element given and returns the index. The variation of this method is lastIndexOf(). This method returns the index of the element starting from the last position.
6. listIterator(int index_value)- This method returns the whole linked list starting from the element present at the given index.
Constructors in Linked Lists:
In a Linked list class, We need to declare objects, so constructors are invoked. There are different types of constructors in the Linked List class, which are,
LinkedList()- This constructor is used to create an empty list.
LinkedList(Collection co)- This constructor is used to create an ordered list of elements. These elements are from the given input.
Types of Linked Lists in Java:
Internally in a Linked list class, the list created is a doubly-linked list.
A double-linked list contains an extra pointer or, in this case, a reference.
It is known as the previous reference. It references the address of the previous node.
Single Linked List:
Typically there is only one reference present in any Linked list. It is known as a singly linked list. The last node, known as 'tail' has a null value as it is a reference. In this list, traversal is allowed only in a single direction.
Doubly-Linked Lists:
Doubly linked lists contain two reference variables, one pointing toward the previous node address and another pointing towards the next node like every linked list. In this type of List, we can traverse it in any direction.
Circular Linked Lists:
Circular linked lists are the same as single-linked lists except that the last node references the first node. It overcomes the downside of single linked lists where we can traverse it only in a single direction.
Circular Doubly Linked Lists:
Circular Doubly Linked Lists are the same as a double-linked list where the previous reference of Head references Tail node. The last node references the head node. In this type of list, we can traverse the whole list in any direction.
When and Why is Linked List used over ArrayList?
ArrayList allows fast random read access so that you can grab any element in constant time. In an ArrayList, adding or removing can be done from anywhere, but the end requires shifting all the elements over to make an opening or fill the gap. When you add more elements than the capacity of the array declared, a new array is allocated, and the old array is copied to the new one. As LinkedList uses a doubly-linked list, manipulation with LinkedList is quicker than ArrayList; also, no bit shifting is required in the memory. An ArrayList class can behave as a list only for the reason that it implements List only. LinkedList class can function as a list and queue both since it implements List and Deque interfaces. In a linked list, any extra memory is not wasted.
We can make use of linked lists to implement stacks and queues.
Disadvantages of Linked List:
In a linked list, unlike other data structures, we cannot access random elements. The traversal of the linked list is time-consuming. Direct access to any element requires a traversal of the whole list. We store data and references and consider this a node; thus, it takes up a massive amount of memory.
Applications of Linked Lists:
A linked list is useful for implementation stacks, queues and graph. The linked list is useful as an image viewer. In this context, since every image is linked to another, navigation is easy. Similarly, they can be used for navigating songs in a music player and pages in a web browser, among other applications.
If you are looking for more such tutorials in other tech domains, check out Great Learning Academy.