- Understanding Your Automation Options
- Using the Official WhatsApp Cloud API
- Using Third-Party Providers Like Twilio
- Browser-Based Automation Using Selenium
- Using pywhatkit for Simple Automation
- Scheduling Your WhatsApp Automation
- Best Practices for Reliability and Safety
- Troubleshooting Common Issues
- Conclusion
Automating WhatsApp messages with Python has become a practical solution for developers, businesses, and creators who want to streamline communication. Whether you want to send reminders, alerts, customer updates, or automated responses, Python’s versatility in the real world offers several flexible methods.
In this guide, you will learn how to set up the environment, use different automation options, write sample scripts, and understand the best practices that make automation efficient and reliable. Python web automation allows for various levels of complexity.
Understanding Your Automation Options
Python lets you automate WhatsApp messages through multiple approaches. Each method comes with different levels of reliability, setup needs, and permissions.
All three options support WhatsApp automation using Python, but they differ in complexity and stability. Choosing the right one depends on your project size, budget, and long-term expectations.
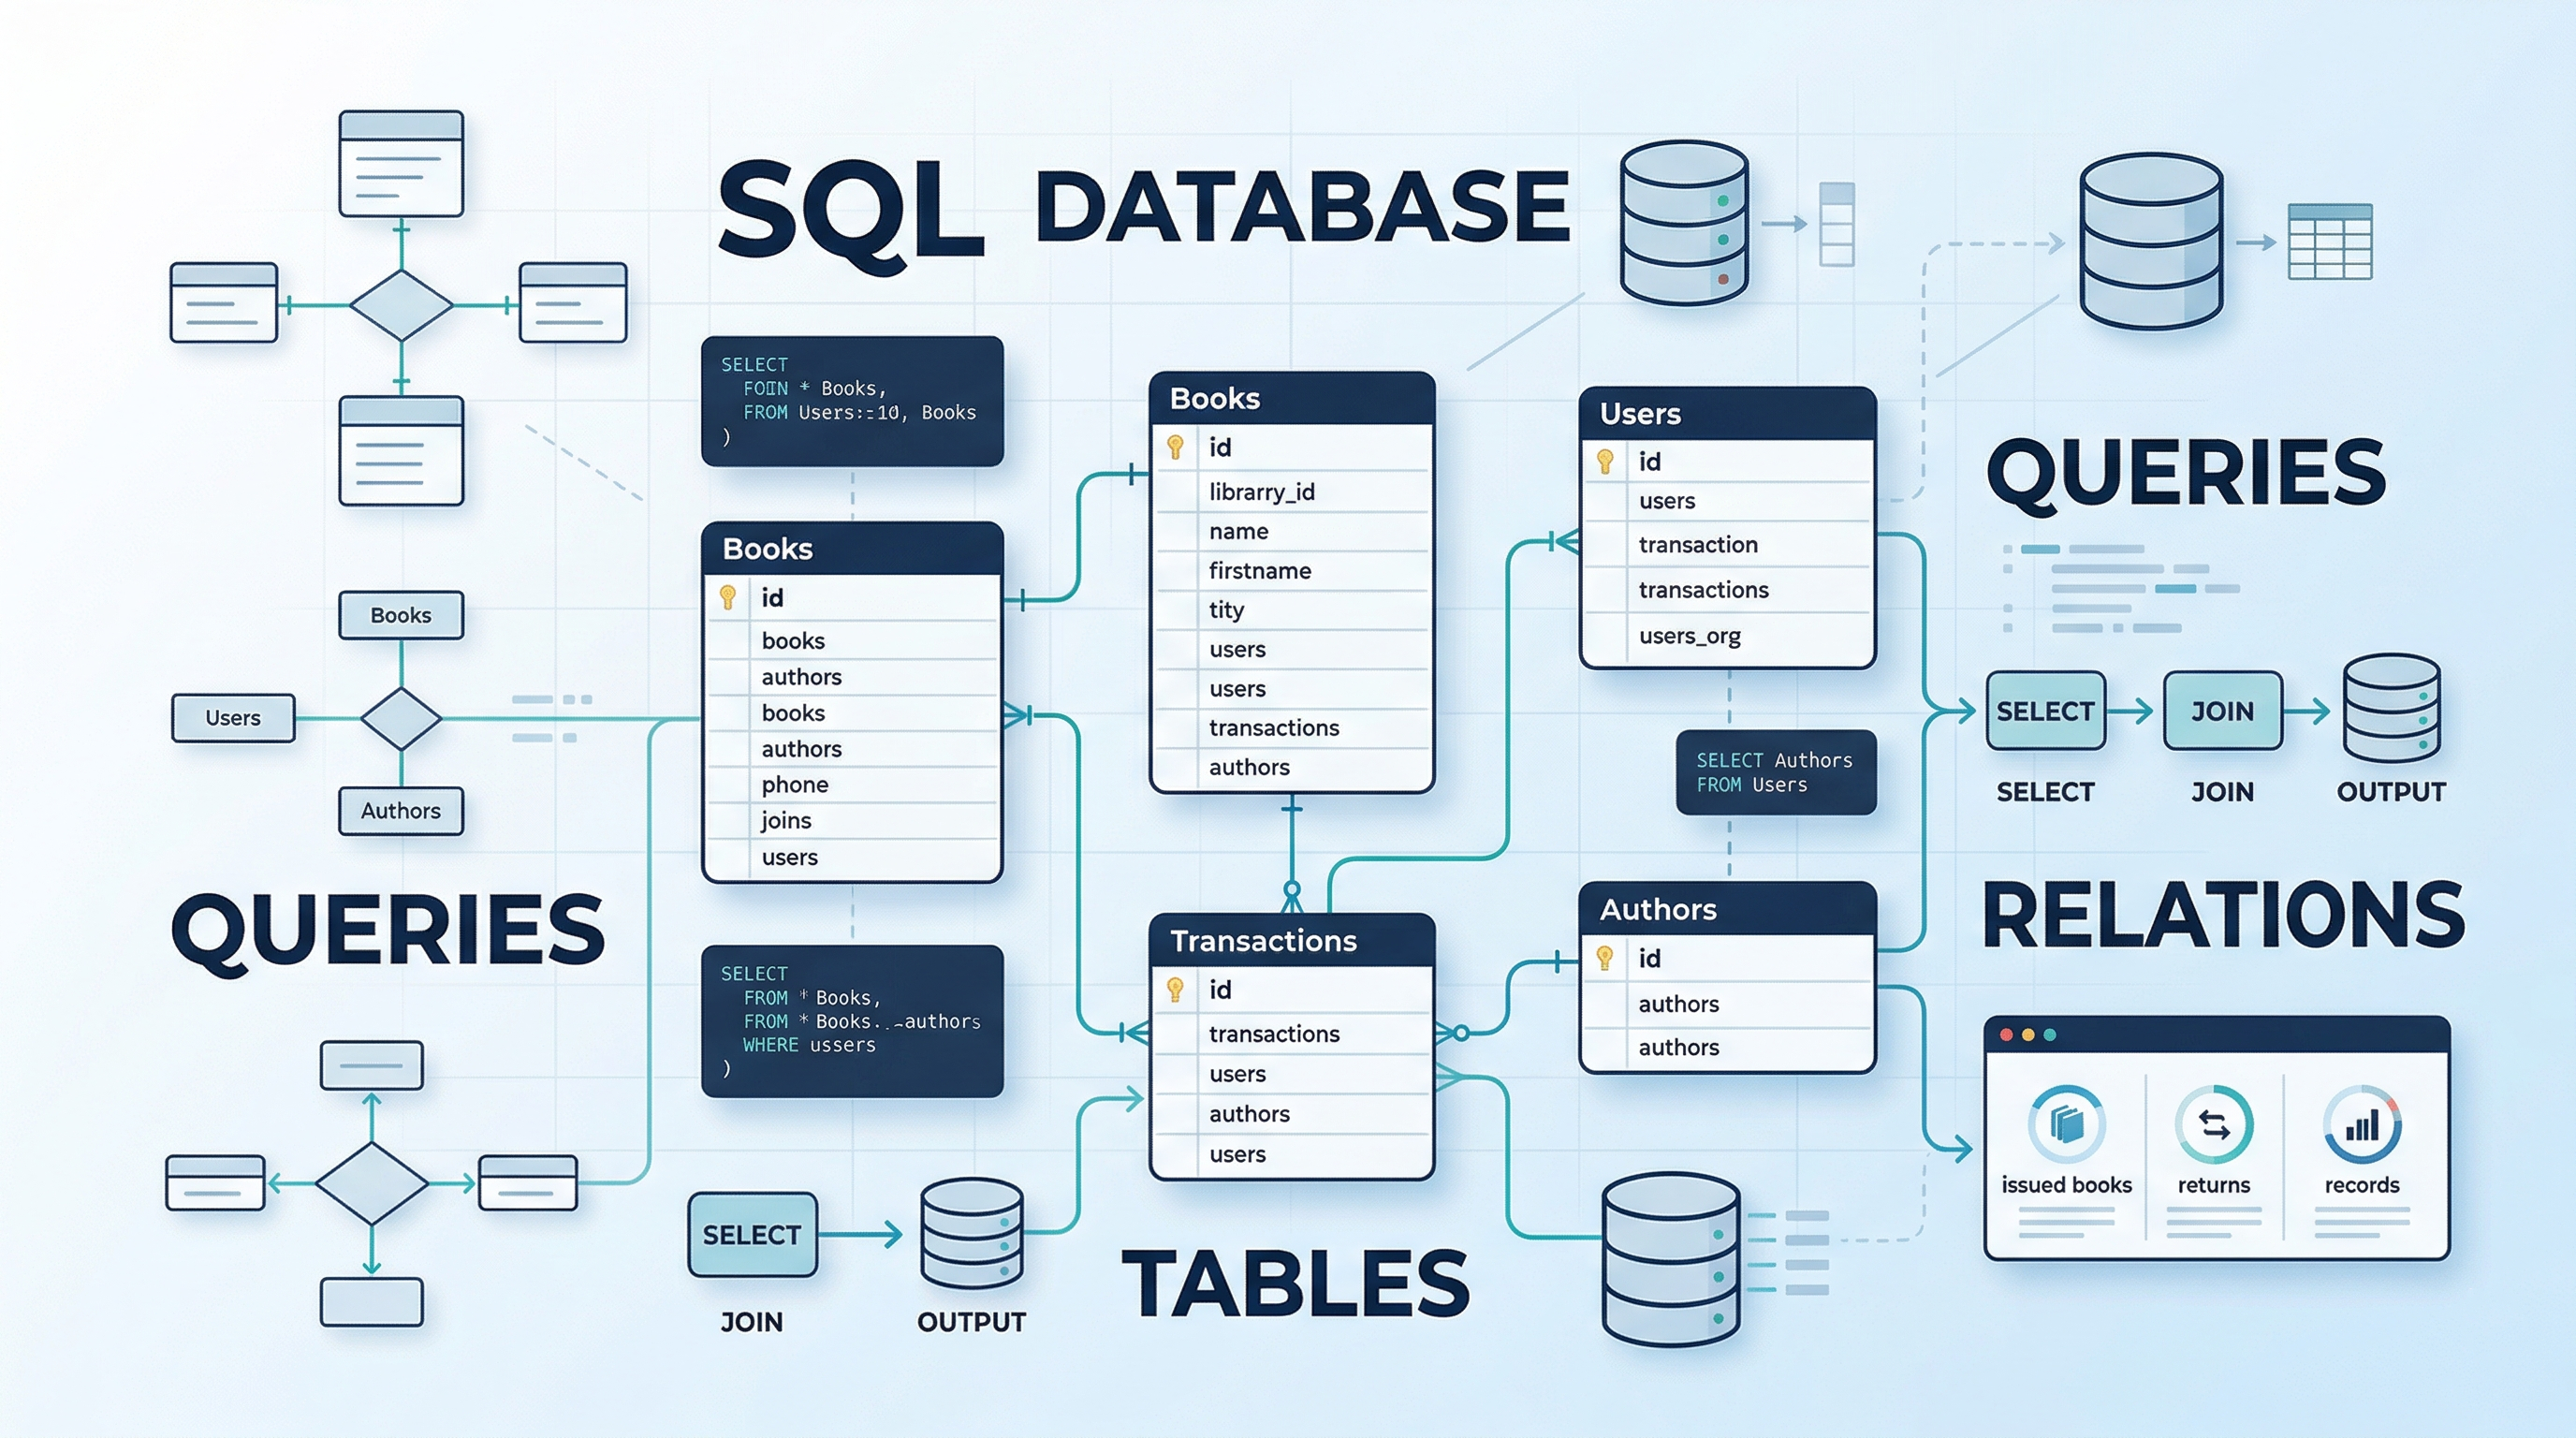
| Method | Best For | Cost | Stability |
| Cloud API | Businesses & High Volume | Free tier (1,000 convos/mo) then paid | High |
| Twilio | Startups & Easy Setup | Pay-per-message | High |
| Selenium | Personal Projects | Free | Low (Brittle) |
| pywhatkit | Simple One-offs | Free | Medium |
If you are looking to move beyond basic scripts and master the full potential of Python for automation, the Master Python Programming program is the perfect next step.
In this course, you will learn the fundamentals of Python: from basic syntax to mastering data structures, loops, and functions. You will also explore OOP concepts and objects to build robust programs.
This comprehensive course provides the structured learning path needed to transition from writing simple scripts to developing professional-grade Python applications.
How does this program help you?
- Foundation to Advanced Mastery: Move from Python basics to advanced concepts like Object-Oriented Programming (OOPs), which is essential for building maintainable automation frameworks.
- Hands-On Expertise: Gain practical experience with File Handling and Exception Handling, critical skills for ensuring your WhatsApp automation scripts don’t crash when encountering network errors or invalid data.
- Industry-Ready Skills: Learn to work with powerful libraries and data structures, enabling you to manage large recipient lists and complex messaging workflows efficiently.
- Recognized Credential: Earn a certificate of completion from Great Learning Academy to validate your Python expertise to potential employers or clients.
Using the Official WhatsApp Cloud API
The WhatsApp Cloud API by Meta is the most professional, stable, and scalable method. It is suitable for production environments and applications that require consistent uptime.
Key benefits
- Hosted by Meta: You do not need to maintain your own server infrastructure.
- Rich Media Support: It supports sending text, images, templates, and interactive messages.
- High Volume: Designed specifically for high-volume commercial workflows.
- Reliability: This is the ideal choice if you want to reliably automate WhatsApp messaging for your business.
- Free Tier: The first 1,000 service (user-initiated) conversations each month are free. Note that business-initiated conversations (like marketing templates) may incur costs depending on your region.
Setup requirements
- Meta Developer account (create an app at developers.facebook.com)
- WhatsApp Business Account
- Business phone number and verification
- Pre-approved message templates (required for initiating conversations)
- Important: You cannot use a number that is currently active on the WhatsApp mobile app. You must delete the account on mobile first or buy a new SIM specifically for the API.
Python example using the Cloud API
import requests
import json

# ==================== CONFIGURATION ====================
# 1. Get from Meta Dashboard -> WhatsApp -> API Setup
ACCESS_TOKEN = "PASTE_YOUR_TEMPORARY_OR_PERMANENT_TOKEN_HERE"
PHONE_NUMBER_ID = "PASTE_YOUR_PHONE_NUMBER_ID_HERE"

# 2. The recipient number (MUST be verified in your dashboard first)
# Format: CountryCode + Number (e.g., 919876543210). NO '+' sign.
RECIPIENT_NUMBER = "91XXXXXXXXXX"

# 3. Meta API Version (Current as of late 2025)
API_VERSION = "v21.0"
# =======================================================

def send_whatsapp_template():
    url = f"https://graph.facebook.com/{API_VERSION}/{PHONE_NUMBER_ID}/messages"

    headers = {
        "Authorization": f"Bearer {ACCESS_TOKEN}",
        "Content-Type": "application/json"
    }

    # This payload uses the default 'hello_world' template
    data = {
        "messaging_product": "whatsapp",
        "to": RECIPIENT_NUMBER,
        "type": "template",
        "template": {
            "name": "hello_world",
            "language": {"code": "en_US"}
        }
    }

    print(f"--- Attempting to send message to {RECIPIENT_NUMBER} ---")

    try:
        # verify=True is standard to avoid security warnings
        response = requests.post(url, headers=headers, data=json.dumps(data))

        # Check if the request was successful
        if response.status_code == 200:
            print("Success! Message sent successfully.")
            print("Response:", response.json())
        else:
            print("Failed! Status Code: {response.status_code}")
            # This will tell you exactly why Meta rejected it (e.g., Invalid Token)
            error_details = response.json()
            print("Error Details:", json.dumps(error_details, indent=4))

            # Specific hint for Error 190
            if error_details.get('error', {}).get('code') == 190:
                print("\nHINT: Your Access Token has expired or is invalid. Please refresh it at developers.facebook.com")

    except requests.exceptions.RequestException as e:
        print(f"An unexpected connection error occurred: {e}")

if __name__ == "__main__":
    send_whatsapp_template()
Important Note:
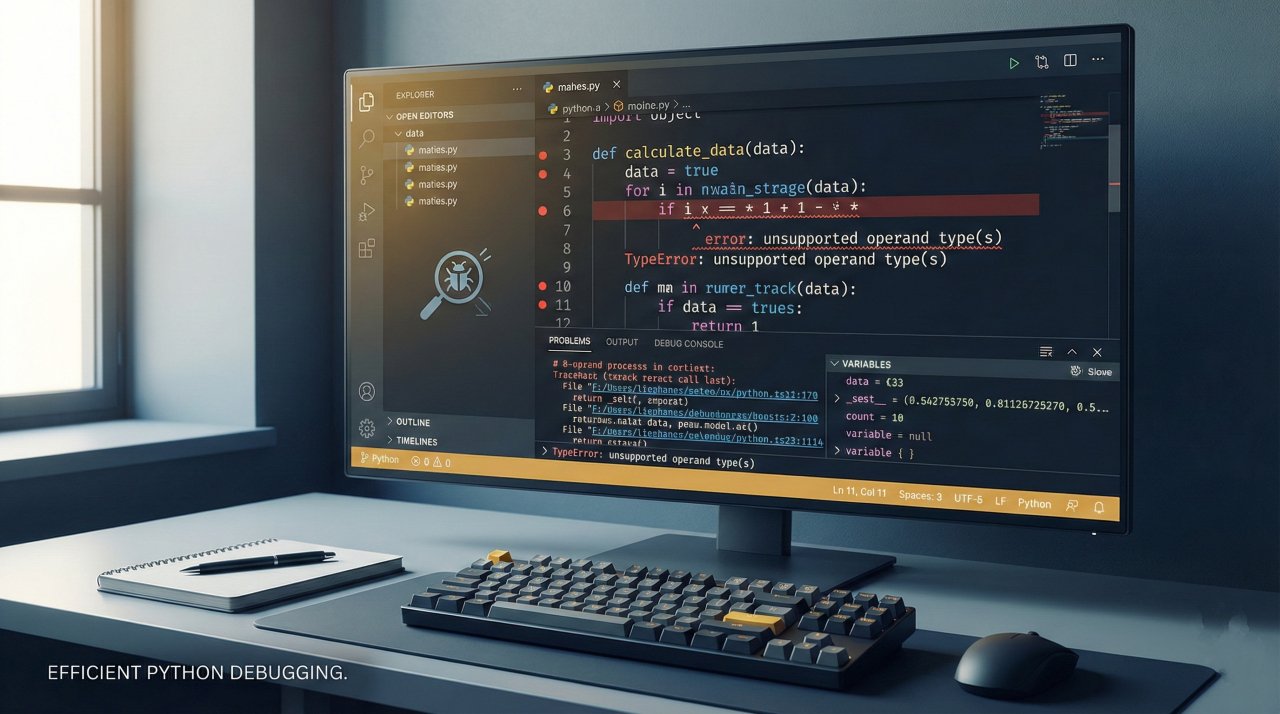
When testing these scripts, it is highly recommended to run them in a local development environment (such as VS Code or PyCharm) rather than a web-based Python compiler. Many online IDEs block outbound network requests to external APIs like Meta for security reasons.
Furthermore, ensure you do not attempt to manually install built-in libraries like json; only external packages like requests need to be installed via pip. If you encounter a ValueError regarding "Unsupported content type" in an online editor, it is a sign that the environment is unable to fetch the necessary packages or reach the WhatsApp servers.
For the most reliable results, run your code directly on your machine and keep your certifi and requests packages updated to avoid SSL verification warnings.
Using Third-Party Providers Like Twilio
If you prefer a simpler onboarding flow, third-party Business Solution Providers (BSPs) such as Twilio offer an easier interface. They provide several popular Python libraries for automation that simplify the connection process.
Advantages
- More friendly documentation and SDKs
- Sandbox mode for testing
- Better monitoring tools
- Great for low- and mid-scale messaging systems
Typical setup flow
- Create a Twilio account
- Activate the WhatsApp Sandbox
- Link your phone
- Install the Twilio Python SDK
Important Note:
To ensure your readers successfully execute these automation scripts, it is essential to emphasize that they must run their code in a local development environment rather than a web-based Python compiler.
Most online editors, such as Programiz, Replit, or browser-based tools, will trigger a NetworkError or an XMLHttpRequest failure because they block outbound connections to external APIs like Meta or Twilio for security reasons (a restriction known as CORS).
For the most reliable results, readers should install the latest version of Python and a professional code editor like Visual Studio Code on their own machines. They should then install the necessary libraries via the terminal, such as pip install requests or pip install twilio, and run the script locally to bypass browser-based network limitations.
Code example
import os
from twilio.rest import Client
from twilio.base.exceptions import TwilioRestException

# Best Practice: Use environment variables instead of hardcoding strings
# In your terminal: export TWILIO_ACCOUNT_SID='your_sid'
account_sid = os.environ.get('TWILIO_ACCOUNT_SID', 'YOUR_SID')
auth_token = os.environ.get('TWILIO_AUTH_TOKEN', 'YOUR_AUTH_TOKEN')

client = Client(account_sid, auth_token)

try:
    message = client.messages.create(
        from_='whatsapp:+14155238886',  # Twilio Sandbox Number
        body='Hello! This is a secure automated message from Python.',
        to='whatsapp:+91XXXXXXXXXX'     # The recipient's number
    )
    print(f"✅ Message sent successfully! SID: {message.sid}")

except TwilioRestException as e:
    print(f"❌ Failed to send message: {e}")
This is a useful option for reliable automation. Note: The code above uses the Twilio Sandbox. To send messages to anyone (not just verified sandbox numbers), you will need to purchase a phone number from Twilio and submit your Business Profile for WhatsApp approval.
Browser-Based Automation Using Selenium
Selenium is a browser automation tool that controls WhatsApp Web directly. It is easy to use for personal or small-scale automation tasks. For a deeper dive into this tool, check out this Selenium tutorial.
Pros
- No business account or approval needed
- Fast to set up
- Great for personal reminders or small scripts
Limitations
- Not stable for high-volume automation
- Requires an open browser
- Breaks if WhatsApp Web changes its layout
Warning: Using Selenium or other browser automation tools with your personal phone number violates WhatsApp's Terms of Service. If you send too many messages too quickly, your number could be permanently banned. Use this method only for testing or small personal projects.
Important Note & Technical Requirement: Unlike API methods, Selenium and pywhatkit require a local installation of Python and a physical web browser. You cannot test these scripts in online compilers or cloud-based sandboxes because they lack the necessary SSL libraries and hardware access to launch a browser window. If you see a ModuleNotFoundError regarding the ssl module, it is a sign that your environment is not equipped to handle browser automation.
Basic Example
from selenium import webdriver
from selenium.webdriver.chrome.options import Options
from selenium.webdriver.common.by import By
from selenium.webdriver.common.keys import Keys
import time

# Create options to save the session
options = Options()
# Change 'User' to your actual Windows username
# REPLACE 'YourActualUsername' with your computer's username
# Example: C:\Users\JohnDoe\AppData...
options.add_argument(r"user-data-dir=C:\Users\YourActualUsername\AppData\Local\Google\Chrome\User Data")

driver = webdriver.Chrome(options=options)
driver.get("https://web.whatsapp.com")
# Now you only scan once!

input("Scan QR Code and press Enter...")

# Find the search bar and select the contact
search_box = driver.find_element(By.XPATH, '//div[@contenteditable="true"][@data-tab="3"]')

# Click the search box and type the contact name
search_box.click()
search_box.send_keys("Mom") # Replace "Mom" with the exact name saved in your phone
search_box.send_keys(Keys.ENTER) # Press Enter to open the chat

# Wait for the chat history to load
time.sleep(2)

# Find the message box
# We look for the main footer text area
msg_box = driver.find_element(By.XPATH, '//div[@aria-placeholder="Type a message"]')
msg_box.send_keys("Automated message from Python")
msg_box.send_keys(Keys.ENTER)
Troubleshooting Tip:
WhatsApp Web updates its layout frequently. If the script suddenly stops working, the XPATHs (like //div[@contenteditable="true"]) might have changed. You will need to right-click on WhatsApp Web, select "Inspect," and update the XPATH in your code to match the new layout.
Note on QR Codes:
The code above includes the user-data-dir argument, which saves your Chrome session to a specific folder. This means you only need to scan the QR code the first time you run the script. Subsequent runs will use the saved session, just like your real browser.
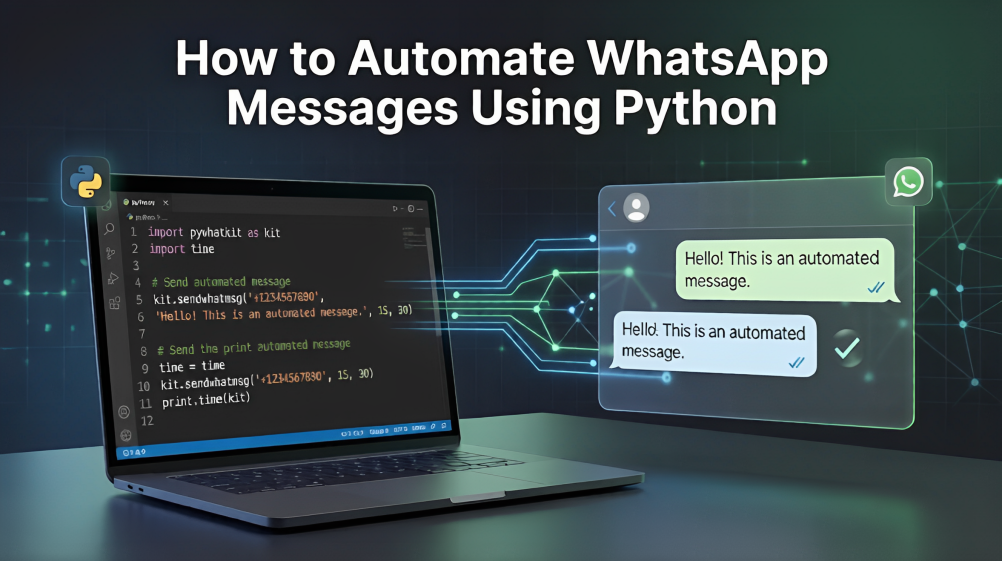
Using pywhatkit for Simple Automation
pywhatkit is one of the easiest ways to automate sending messages at a specific time.
Why developers like it
- Very lightweight workflow
- No complex setup
- Good for personal or hobby projects
Important Setup Note: The pywhatkit library works by physically taking control of your computer's keyboard and mouse to "type" into a browser window. Because of this, it cannot be used in online compilers or cloud-based IDEs. These environments will fail with a ValueError because they lack the "PyAutoGUI" components needed to interact with hardware. To use this method, you must have Python installed locally on a computer with a monitor and an active internet browser where you are already logged into WhatsApp Web.
Example
import pywhatkit

pywhatkit.sendwhatmsg(
    "+91XXXXXXXXXX",
    "This is an automated Python message",
    15, 30
)
Although simple, it is not intended for enterprise-level automated WhatsApp message sending.
Scheduling Your WhatsApp Automation
Depending on your method, different scheduling approaches are available.
For Cloud API or Twilio
- Use cron jobs on Linux
- Use Windows Task Scheduler
- Use task schedulers within frameworks like Celery
- Integrate with message queues like RabbitMQ or AWS SQS
For browser automation
- Use Python’s schedule library
- Trigger scripts at fixed times
- Keep WhatsApp Web logged in
General tips
- Make sure the script can reconnect if the session expires
- Add try and except blocks for error handling
- Log each outgoing message
Best Practices for Reliability and Safety
WhatsApp enforces strict messaging policies, especially for business use. Follow these guidelines to keep your automation running smoothly.
Recommended practices
- Always use opt-in from the user before messaging
- Keep your templates clear, friendly, and useful
- Store access tokens securely using environment variables
- Set up retries for temporary failures
- Use logging to track delivered and undelivered messages
- Avoid spamming or sending repetitive messages
- Follow country-specific data protection laws
For API users
- Keep access tokens refreshed
- Monitor message delivery reports
- Test templates before production
For browser automation users
- Avoid sending too many messages in a short span
- Update element locators if WhatsApp Web changes
Troubleshooting Common Issues
Automation setups can fail for several reasons. Here are common problems and their solutions.
If the Cloud API returns an authentication error
- Check the token
- Verify that the token has not expired
- Confirm the correct phone number ID
If Twilio rejects the message
- Ensure the message follows sandbox restrictions
- Check your approved templates for production use
If Selenium cannot find elements
- WhatsApp Web may have updated its structure
- Add explicit waits to load the chat window
If pywhatkit fails to send
- Ensure the browser is not blocked
- Keep your system clock accurate
- Update pywhatkit to the latest version
Conclusion
Python offers powerful ways to automate WhatsApp messaging, whether through official APIs, third-party providers, or browser automation tools. Each approach suits different needs, and the right choice depends on the scale of your project. With the right setup, planning, and compliance, you can build reliable workflows that reduce manual effort and enhance communication.
By following the guidance in this article, you can confidently plan your next WhatsApp automation project and make the most of Python in creating efficient messaging systems.