JDBC stands for Java Database Connectivity. It is a specification from Sun Microsystems with a standard abstraction.
Many questions arise, like Why JDBC? What was present before JDBC? What is the purpose of using the JDBC? How can we use it? etc.,
This JDBC tutorial was designed with maximum efficiency with all the facts and examples of the topics included.
Why did JDBC come into existence?
In earlier days, the front-end applications are connected to the Databases using the functions provided by the database vendors. For example, the C and C++ applications are connected to the databases using a set of functions given by Oracle Corporation called orcl.h header file. But, by this, the application becomes database dependent because every DB vendor gives its own set of functions for communication. To overcome this, Microsoft with Simba Technologies has provided us with the ODBC (Open Database Connectivity) community with which we can connect and communicate with Database in an independent manner. Now the general question arises like,
Why is ODBC not used in Java Applications?
ODBC API is written in C Language with pointers. But Java applications do not contain pointers, so the Java code is being converted to pointers code internally which is time-consuming and poor in performance. Also, ODBC is platform-dependent and database-independent. In order to overcome this problem, Sun Microsystems introduced the JDBC technology to make the Java programs platform and database independent.
JDBC is a Java API which offers a natural Java interface for working with SQL.
What is JDBC?
Primarily, JDBC is an API (Application Programming Interface) or channel with which we can connect Java applications to various databases. It is a Java API that accesses the data from various kinds of Relational databases. It works with Java on various kinds of platforms like Windows, Linux, MacOS etc.,
Before reading this tutorial, you need to have the basic knowledge of the Core Java concepts like Abstraction, Interfaces, Collection Framework, Exception Handling etc.,
In this tutorial, we will discuss the JDBC Architecture, SQL Syntax, Environment set-up, Drivers used, Connections, and Statements to query the Database. Let’s get started.
JDBC Architecture:
The JDBC API proposed will support both two-tier and three-tier architecture flows. So, in general the architecture is comprised of two layers,
- JDBC API – Java application to Driver Manager Connection
- JDBC Driver Manager – JDBC Manager to Driver Connection
JDBC API provides transparent connectivity using the Driver Manager and database-specific drivers.
JDBC Driver Manager provides assurance for the usage of the correct database driver to access each data source.
Common Components through which JDBC interacts with database:
- JDBC API
- The API provides standard methods and interfaces to smoothen the communication with the database.
- The process is simplified by providing two packages java.sql. * and javax.sql.*.
- The two packages exhibit WORA (Write Once Run Everywhere) capability which contains both Java SE and Java EE support.
- JDBC Driver Manager
- The Driver Manager manages the list of database drivers.
- It loads the database-specific Driver in Java application to establish the connectivity with the database.
- We use this Manager to make a call to the database.
- JDBC Test Suite
- Test Suite is used for Testing purposes (such as Insertion, deletion etc.,).
Types of JDBC Architecture:
- Two-Tier Architecture:
- The Java Application directly communicates with the Database.
- When the user sends in a query, the results are sent back to the user directly.
- It is similar to the Client-Server model where Client is the User Machine and Server is the Data source machine.
- Three-Tier Architecture:
- The Java Application communicates with the middleware rather than the database itself.
- When the user sends in a query, it hits the middle ware which in turn hits/commands the Data source to get the results back and follows the same path to the user.
- This model is most predominant due to its abstraction at each layer.
Structured Query Language (SQL):
SQL is basically elaborated as Structured Query Language. It allows the users/programmers to perform various operations on the database. The operations can be creating the records, reading the entries, updating the content and Deleting the entries.
Why SQL?
- Used by almost all Relational databases.
- Allows users/programmers to write the database code independent on the underlying database.
There is a fact that without learning the SQL we cannot understand the concepts of JDBC. We will have a quick and basic overview of the SQL, SQL Operations often referred to as CRUD Operations and their syntax.
- CREATE Database
The CREATE DATABASE statement is generally used for creating a new database. The syntax is,
SQL> CREATE DATABASE DATABASE_NAME;
- DROP Database
The DROP DATABASE statement is generally used for deleting an existing database. The syntax is,
SQL> DROP DATABASE DATABASE_NAME;
- CREATE Table
The CREATE TABLE statement is used for creating a table within a database. The syntax is,
SQL> CREATE TABLE table_name
(
column_name1 coulumn_data_type,
column_name2 coulumn_data_type1,
…
);
- DROP Table
The DROP TABLE statement is used for deleting an existing table in the database. The syntax is,
SQL> DROP TABLE table_name;
- INSERT Data
The INSERT statement is used for inserting the data into the table. It represents what new data should appear in the respective columns. The syntax is,
SQL> INSERT into TABLE_NAME VALUES (coulmn1, column2, …);
- SELECT Data
The SELECT statement is basically used to retrieve or fetch the data from the database. The syntax is,
SQL> SELECT column_name1, column_name2, …
FROM table_name
WHERE conditions;
(OR)
SQL> SELECT *
FROM table_name
WHERE conditions;
- UPDATE Data
The UPDATE statement is used in order to update the data. The syntax is,
SQL> UPDATE table_name
SET column_name1 = value1, column_name2 = value2, …
WHERE conditions;
- DELETE Data
The DELETE statement is used to delete the data from the tables. The syntax is,
SQL> DELETE FROM table_name
WHERE conditions;
From the above details we can conclude that SQL provides us the capability to Create, Read, Update and Delete the data from the databases. These operations are basically referred to as CRUD Operations.
Master SQL and Database management with this SQL course: Practical training with guided projects, AI support, and expert instructors.
Environmental setup:
To start with JDBC, you need to set-up the environment by following the below steps. Please note that the below environment set-up is subjected to only Windows platform.
- Install Java
- Install Database
- Install Database Drivers
- Set the Database Credentials
We will delve into each step below,
- Installing Java environment
- Install the latest JDK (Java Development Kit) of the JDK version you wish to work upon from the Oracle official site by accepting the terms and conditions. https://www.oracle.com/java/technologies/javase-downloads.html#JDK15.
- After the download, make sure the environmental variables mentioned below are set as follows,
- JAVA_HOME: C:Program FilesJavajdk1.15.0.
- CLASSPATH: C:Program FilesJavajdk1.15.0_220jrelib.
- PATH: C:Program FilesJavajre1.15.0_220bin.
- If the above-mentioned variables are already present then, please make sure to verify them if they are correct.
- By the above installation or verification, you will automatically get the java.sql and javax.sql packages along with the JDK you installed.
- Installing the Target Database
- The most important thing in JDBC is you need a Database where you create a Database/Table and execute your own queries and modify them accordingly.
- You have plenty of choices to install the most suitable database for you.
- MySQL Database: It is an open-source database. It can be downloaded from https://dev.mysql.com/downloads/mysql. In addition, also download the MySQL Administrator from https://dev.mysql.com/downloads/workbench/ and MySQL Query Browser. Finally download and unzip the MySQL Connector/J from https://dev.mysql.com/downloads/windows/installer/8.0.html. Accordingly set the CLASSPATH variable C:Program FilesMySQLmysql-connector-java-8.0.22mysql-connector-java-8.0.22.bin.jar. The Driver version may vary based on your installation.
- Installing the Database Drivers
- The latest JDK specification includes the JDBC-ODBC Bridge Drivers that makes ODC drivers available for the programmers using the JDBC API for Development and Testing purposes.
- Now-a-days the most of the JDBC drivers are shipped along with the database installation only.
- Setting the Database Credentials
Assuming that we are going to use the MySQL database,
- By Default, the administrator is set to root and provision is allowed to choose the password.
- By using the above root id and password, you can create another user id and password of your choice.
- After this, you can navigate to the installation directory of MySQL and create the Database and Tables further for the experimental purposes.
Now, you guys are ready for experimenting with JDBC Let’s get started with the in-detail concepts involved in JDBC API. Now, we will have a sample JDBC Program with which you can get a complete idea on how to establish a connection to the database and perform the operations.
JDBC Sample Code:
In this example, you will see how to implement he five basic steps to connect with the Oracle database using JDBC in Java program.
- Create Table STUDENT_DETAILS.
create table student_details (studentNumnumber(10), lastName varchar(50), firstName varchar(50), class number(3), total_marks number(5));
- Insert data into the STUDENT_DETAILS table
insert into student_details values (1, ‘ABC’, ‘A’, 2, 99);
insert into student_details values (2, ‘XYZ’, ‘X’, 2, 80);
- Implement Java Program
// import sqlstandard package to use it in our program
    importjava.sql.*;
    publicclassSample_JDBC_Program {
    publicstaticvoidmain(String[] args) throwsClassNotFoundException, SQLException {
        // store the SQL statement in a string
        String QUERY = "select * from student_details";
        //register the oracle driver with DriverManager
        Class.forName("com.mysql.jdbc.Driver");
        // If we have use>Java 7 we open the connection in try statement
        try(Connection conn = DriverManager.getConnection("jdbc:mysql:thin:system/pass@123localhost:1521:XE"))
        {
                Statement statemnt1 = conn.createStatement();
                // After Creating the statement, execute it
                ResultSet rs1 = statemnt1.executeQuery(QUERY);
                {
                    //Get the values of the record using while loop from result set
                    while(rs1.next())
                    {
                        intempNum = rs1.getInt("studentNum");
                        String lastName = rs1.getString("lastName");
                        String firstName = rs1.getString("firstName");
                        String email = rs1.getString("email");
                        String class = rs1.getString("class");
                        String totalMarks= rs1.getString("total_marks");
                        //store the values which are retrieved using ResultSet and print them
                    System.out.println(empNum + ","+lastName+ ","+firstName+ ","+class number +","+class +","+totalMarks);
                    }
                }
        }
        catch(SQLException e) {
            //If any exception occurs,we can catch it and exit the program
            e.printStackTrace();
        }
       }
    }
JDBC Driver Types:
JDBC Driver is the key part of the language, which is implemented with defined interfaces in JDBC API and through which we can interact with the user’s database server. As we know that JDBC is just a standard specification, so it provides the java.sql.* package for with the required interfaces and classes without any implementations. The Third-party Drivers are responsible for performing these implementations. To put it in a simple manner, JDBC Drivers are responsible for opening the database connections and sending in the SQL queries and then retrieve the required results with Java.
Types of JDBC Drivers:
- Type 1: JDBC-ODBC bridge driver
- Type 2: JDBC Native-API driver
- Type 3: JDBC-Net pure driver
- Type 4: JDBC Thin driver or 100% Pure Java driver
So, why do we have these many drivers? Well, the answer is since we have a variety of operating systems and hardware platforms where Java operates. Sun Microsystems have categorized the driver implementations into the above four categories.
- Type 1: JDBC-ODBC bridge driver:
A Type 1 JDBC driver translates the JDBC interface calls to ODBC calls. In this type, the JDBC bridge is used to access the ODBC drivers that are installed on the Client machine. There is a requirement that if we are using ODBC, we need to configure the Data source name (i.e., name of the target database). This driver was proved useful in the early times as most of the databases only supported the ODBC access. But in recent times, this type of driver is only recommended for experimental purposes. As per the JDK8 specification, it will be removed as it was considered as only the traditional solution. Oracle recommends us to use the JDBC drivers provided by the vendors of the database only instead of this JDBC-ODBC bridge.
Sun microsystems provides us the JDBC-ODBC bridge driver in the
sun.jdbc.odbc.JdbcOdbcDriver and this driver is close-source, that is it uses the native code language rather than Java programming language.
Advantages:
- This type of driver is extremely easy-to-use.
- It can be easily connected to any of the databases.
Disadvantages:
- The performance can be degraded because of the JDBC-ODBC translation of function calls.
- Explicitly the ODBC driver needs to be installed on the client machine. This driver is platform dependent as it makes use of ODBC and requires the use of native libraries on which the JVM relies upon.
- Type 2: JDBC Native-API driver
The Type 2 JDBC Native-API driver translates the JDBC method calls to the Native calls of the database Native-API. The Type 2 driver is similar to the JDBC-ODBC bridge driver except that the ODBC driver is replaced with the Native API calls (C/C++ etc.). These API calls are unique to the database. It is made sure that the native code part is targeted for the specific database product. That is, it uses the client-side libraries of the database product. This architecture eliminated the need for the ODBC driver configuration on the client machine, and the native libraries that are to be used by the database are shipped along by the vendors. This practice was quickly adopted by the DB vendors because of the inexpensiveness and quickness of the reusability of drivers.
Advantages:
- The Type 2 driver performance is high as it eliminates the ODBC overhead.
Disadvantages:
- This driver also needs to be installed on the client-machine.
- The vendor-client library provided by the DB vendors needs to be installed on each client’s machine.
- Any change in the database, we must change the Native-API as it is database specific now.
- Type 3: JDBC-Net Pure Java Driver
The Type 3 JDBC-Net Pure Java driver is also called a Middleware translation driver as it uses the three-tier approach. In this, Java sends the JDBC interface calls to an intermediate server. The intermediate server then connects to the database instead of the JDBC driver. In this sort of driver, the JDBC clients use quality network sockets for communication with the middleware application server. This type of communication in which the intermediate/middleware is being used is also called a ‘PROXY’ server communication.
The Type 3 driver proved to be the 100% Java solution, but it does not gain much traction then.
Advantages:
- There is no requirement for any client-side library to be installed on the client machine.
Disadvantages:
- Network support requirement on the client machine.
- Database-specific coding needs to be done in the intermediate/middle server.
- Maintenance is expensive as we use the database-specific coding and the performance also remains the same.
- Type 4: JDBC Thin driver or 100% Pure Java driver
The Type 4 100% Pure Java Driver is also called Direct to database Pure Java Driver. It translates the JDBC calls directly to the vendor-specific database calls. These drivers are implemented specifically to a target database and are the most widely used drivers now. These are written completely in Java and are platform-independent. The portability is achieved as these drivers are part of the JVM. When compared to the Type 3 drivers, it does not require any additional (intermediate server) layer to work upon. The architecture is composed of all the logic of the direct database communication within a single driver encapsulated in the JDBC API implementation. This approach streamlines the easy development and deployment with only a single-tier 100% pure Java package.
Advantages:
- The Type 4 driver is too flexible due to its portable nature.
- It can also be downloaded dynamically.
- This driver has the highest performance when aligned with the other types of drivers above.
Disadvantages:
- The Type 4 drivers are proprietary in nature aligned to their specific network protocols.
- These are again the database-specific drivers.
Driver Use cases:
As we have four types of drivers with their own merits and demerits, questions do arise like which type of drivers should I prefer/use for my Java applications. No problem, we will let you know which driver can be used based on your purpose.
- Type 4 drivers can be used if you are preferring to use Oracle, Sybase, IBM databases. This is suggested when you are using only one type of database in your application.
- Type 3 drivers can be used if your Java application accesses multiple databases at the same time.
- Type 2 drivers can be used in situations where the above two drivers Type 4, and Type 3 drivers are not yet available.
- Type 1 driver as already mentioned as a not widely used driver. It can be used as a traditional solution only for Development and Testing purposes.
JDBC Connections:
The JDBC Database Connections come into picture after the installation of the JDBC Driver in the system.
The programming involved in establishing the JDBC Connection is simple and comprises five steps depicted below.
- Import the Packages
- Load the Driver
- Establish the Connection
- Create and Execute the Statement
- Close the Connection
Now we will dive into these five steps now,
- Import the Packages:
Firstly, we should import the existing packages in our Java program/application. These import statements help the Java Compiler where to find the classes you reference in the code. By this, we can make sure that the JDBC API classes, sub-classes are available in the program. Irrespective of JDBC Driver being installed, we import the below package, which is the standard JDBC package that allows us to perform CRUD operations in our code.
import java.sql.*
We can import other classes based on the functionality we use in our Java program.
The JDBC API 4.0 mainly provides us with two standard java packages.
- java.sql.*
This package contains most of the standard JDBC functions used for Creating, Executing the queries etc.,
| Classes/ Interfaces | Description |
| BLOB | It represents the SQL BLOB value in the Java program |
| CallableStatement | It is used to execute the SQL Stored Procedures |
| CLOB | It represents the SQL CLOB value in the Java program |
| Connection | It creates a connection with a specific database |
| Date | It provides support for Date SQL type |
| Driver | It creates an instance of a Driver with DriverManager |
| DriverManager | It provides the service to manage the set of Drivers |
| ParameterMetaData | It is an Object which is used to get the types and properties of each parameter used in the PreparedStatement |
| ResultSet | It is used to retrieve the result row by row |
| ResultSetMetaData | It is used to get the details about the types and properties of the ResultSet Object |
| RowId | It specifies the SQL Row id value |
| SavePoint | It is the save point in the SQL transaction |
| SQLData | It is used to map the SQL type to the class in the Java program |
| SQLXML | It represents the SQL XML type |
| Statement | It is used to execute the static SQL statement |
| DriverPropertyInfo | It specifies the Driver properties to make a connection |
| SQLException | It provides the database error information |
| SQLTimeoutException | Sub-class of SQLExceptionand is thrown when the timeout specified is expired by the Statement |
| SQLWarning | This exception provides information on the database access warnings |
| Struct | It is a Standard mapping of the Java program for SQL structured type |
- javax.sql.*
This package is a JDBC extension API which provides server-side data access and processing in Java applications.
| Classes/ Interfaces | Description |
| CommonDataSource | It is an interface which define the common methods between DataSource, XADataSource and ConnectionPoolDataSource |
| ConnectionPoolDataSource | It is a factory of PooledConnection objects |
| DataSource | It is a factory of Connections to a physical datasource |
| PooledConnection | Used to manage the Connection pool |
| RowSet | Provides support to the JDBC API for Java Components bean model |
| RowSetMetaData | It specifies the information about the columns in the RowSet object |
| ConnectionEvent | Provides the details about the occurrence about the connection-related events |
| ConnectionEventListener | Used to register the PooledConnection object events |
| RowSetEvent | It generates when an event occurs to the RowSet object |
| StaementEvent | It is sent to all the StatementEventListeners which are registered when PooledConnection is generated |
- Load the Driver:
In order to make a connection to the database, we need to load/register the driver. We need to register it only once per database in the program. To put it in a simple way, registering/Loading the Driver means the process by which the Driver class file gets loaded into the memory and hence, we can utilize it as a form of an implementation of the JDBC interfaces. The need of registration is only once and the ways of registering it are two. It entirely depends on the user to choose among the two.
- Class.forName()
This is the most common approach to register the driver. By using this, the Driver class can be implicitly loaded at runtime into the memory. While Loading itself the Driver gets registered automatically. The fact that it is most preferable is that it permits the user to make the driver registration configurable and portable.
Note: forName() is only suitable for JDK Compliant Virtual Machines.
Here is an example,
| try { Class.forName(“com.mysql.jdbc.Driver”);} catch (Exception e) { System.out.println(“Unable to load the Driver class!”); System.exit(1);} |
Below are the Driver names for various Databases,
| DataBase Name | JDBC driver Name |
| MySQL | com.mysql.jdbc.Driver |
| Oracle | oracle.jdbc.driver.OracleDriver |
| Microsoft SQL Server | com.microsoft.sqlserver.jdbc.SQLServerDriver |
| MS Access | net.ucanaccess.jdbc.UcanaccessDriver |
| PostgreSQL | org.postgresql.Driver |
| SyBase | com.sybase.jdbcSybDriver |
- DriverManager.registerDriver()
This approach provides the users to register the drivers using the in-built class DriverManager available in java.sql package. This acts as a mediator between the Java Application and the target database.
public static void registerDriver(driver) – This method loads the Driver class of the database and establishes the connection with the DB. If the driver is already registered, it will not take any action. Two exceptions are thrown by this method.
i. SQLException: When the database error occurs.
ii. NullpointerException: If the Driver is not available or not set to the classpath.
Here is an example,
| try { Driver driver = new com.mysql.jdbc.Driver; DriverManager.registerDriver(driver);} catch (ClassNotFoundException e) { System.out.println(“Unable to load the Driver class!”); System.exit(1);} |
- Establish the Connection:
After the Driver has been loaded, the Connection should be created and established. This step needs to be performed once the required packages are imported and the Drivers are loaded and registered only. The getConnection() method in DriverManager class is used to get the connection with Database. The getConnection() method is an overloaded method.
- getConnection(url);
- getConnection(url, username, password);
Let’s explore the Connection interface.
Connection Interface:
- A Connection is nothing but a session between Java application and the Database.
- Its available in the java.sql package.
- It is an interface with a factory of Statement, PreparedStatement, MetaData etc.,
- It also provides methods related to the Transaction Management like commit(), rollback() etc.,
Let’s also explore the DriverManager class.
Driver Manager class:
- The Driver Manager class acts as an interface between the user and the drivers.
- It keeps track of all the set of drivers and maintains the registered drivers and also handles the establishment of connection between the database and the driver.
Here is an example,
| Connection con = DriverManager.getConnection(jdbc:thin:@localhost:1521:xe, System, pass@123); |
- thin refers to the Driver type (oracle, mysql etc.,).
- localhost is where the Oracle database is running.
- 1521 - port number to connect to DB.
- xe – SID (optional)
- system – Username to connect to the Oracle Database.
- pass@123 – Password
The below table lists the connection URL for various databases,
| Database | Connection string/ DB URL |
| MySQL | jdbc:mysql://hostname/databaseName |
| Oracle | jdbc:oracle:thin:@hostname:portNumber:databaseName |
| Microsoft SQL Server | jdbc:db2:hostname:port Number/databaseName |
| PostgreSQL | jdbc:sybase:Tds:hostname: port Number/databaseName |
Note that the Database URL is an address that usually points to the user’s database.
- Create and Execute the Statement:
After the establishment of the database connection, now user can interact with the database. For this, we need to create a Statement to perform the SQL query and then execute the statement.
- Creating a Statement:
We use the methods from Connection class to create the queries. As part of the java.sql package we have three statement interfaces available.
- Statement
It is used to implement simple statements with no parameters and return the ResultSet object.
| Statement statement1 = conn.createStatement(); |
- Prepared Statement
This is extended from the Statement interface with extra features of using the parameterized statements and pre-compiled SQL queries. The performance of this is high as it pre-compiles the queries before-hand.
| String query = “select * from employees emp where emp.id =1”;PreparedStatement statement2 = conn.prepareStatement(query); |
- Callable Statement
This is extended from the PreparedStatement interface with extra features of implementing the parameterized SQL statements to invoke and execute the Stored procedures or functions in the database.
| CallableStatement statement3 = conn.prepareCall(“call procedures(?,?)”); |
Note: We will investigate these Statements in-depth going further.
- Executing the Statement:
The query developed can be executed for updating/inserting in the database and retrieving the data. There are four important methods for executing the SQL query.
- ResultSetexecuteQuery (String sql)
This is the method in the Statement interface and is used to retrieve the results from the database. It is similar to the SELECT query in SQL.
- int executeUpdate (String sql)
This is used for specified operations like INSERT, UPDATE, DELETE (DML statements) and DDL statements that return nothing. It is mostly used to insert and update the record entries in the database.
- boolean execute (String sql)
This is used to execute the SQL query. It returns TRUE if it is a SELECT query. It returns FALSE if t s UPDATE or INSERT query.
- int[] executeBatch ()
This method is used to execute the batch of SQL queries. If all the queries are successful then, it returns the array of update counts. It is mostly used to insert or update the records in bulk.
- Retrieving the Results:
The executeQuery() method in the Statement interface will return the results in the form of a ResultSet Object. The returned object will never be NULL even if there are no matching records in the database.
ResultSetrs = statement1.executeQuery(QUERY);
This method is only used for SELECT query. If any INSERT/UPDATE query is given as input, then it throws the SQLException saying that ‘this method cannot be used for UPDATE’. ResultSet is an Enumerator Object.
- Close the Connection:
Finally, after performing various operations and manipulations on the database. Now, we need to close the connection. The resources opened should be closed as we may end-up getting out of connection exceptions and errors at a later point of time. If we close the connection object, then the Statement and ResultSet objects are going to be automatically closed.
conn.close();
After Java 7, the JDBC connections can be automatically closed if we use the try-catch block. This feature is called Automatic resource management.
| try (Connection conn = DriverManager.getConnection(url, user, password)){ //database connection and operation} |
JDBC Statements:
JDBC Statements are used to execute the SQL queries. The JDBC API provides us with three types of statements.
- Statement interface
- The Statement interface is used in-order to get the general-purpose access to the target database.
- It is proven as useful when we have static SQL queries which needs to be run at run time.
- No parameters can be sent in to retrieve the results based on the conditions.
Here is an example,
Statement statement1 = null;
try {
statement1 = conn.createStatement();
} catch (SQLExcetion e) {
…
} finally {
statement1.close();
}
- After the creation of the statement object the user needs to execute it. We can use any of the three below methods to do that operation.
- booleanexecute(String sql)
- int execcuteUpdate(String sql)
- ResultSetexecuteQuery(String sql)
- Prepared Statement interface
- This interface is used if the user plans to use the SQL queries and execute them several times.
- The main difference is that the PreparedStatement accepts the parameters at rum time.
- Generally, all the parameters in JDBC are denoted by ‘?’symbol. This symbol is known as PARAMETER MARKER/ REPLACEMENT OPERATOR/ PLACE RESOLUTION OPERATOR. These values should be binded before the execution of the SQL statement.
- In-order to bind the values together with the parameters, we use setXXX() method is used, where XXX is the Java Data type of the value that the user wishes to bind.
- Please remember that if the user did not send any values to the parameters then SQ Exception will occur.
- Each of the parameter markers is referred to by the ordinal positions. For example, the first marker is position 1 and so on.
- All of the Statement object’s methods are executed by execute(), executeUpdate() and executeQuery() methods only.
- Prepared Statement Object uses only IN statements.
Here is an example,
PreparedStatementpStatement = null;
try {
String SQLStatement = “SELECT * FROM STUDENT_DETAILS sd WHERE sd.studentNum=1”;
pStatement = conn.prepapredStatement(SQLStatement);
} catch (SQLException e) {
…
} finally {
conn.close();
}
- Callable Statement interface
- This interface is used whenever the user wants to access the Database Procedures and Functions.
- This is also known for accepting the input parameters at the run-time.
- Unlike as PreparedStatemet, Callable Statement uses the IN, OUT and INOUT Parameters.
| Parameter | Description |
| IN | A parameter with value is not known while the SQL statement is being created. The programmersare responsible to bind values to IN parameters with the setXXX() methods. |
| OUT | A parameter whose value is being supplied by the SQL statement that it returns. The programmer generally retrieve values from theOUT parameters with the getXXX() methods. |
| INOUT | A parameter thatdelivers both input and the output values. The variablesbasically bind with the setXXX() methods and retrieve values with the getXXX() methods. |
Here is an example,
CallableStatementcStatement = null;
try {
String SQLStatement = “call {MY_PROCEDURE(?, ?)}”;
cStatement = conn.prepareCall(SQLStatement);
} catch (SQLException e) {
…
} finally {
conn.close();
}
- The Callable Statement with only IN parameters behaves the same as the PreparedStaement only.
- When the SQL statement has either OUT or INOUT parameters, it is mandatory that we need to employ the registerOutParameter() method.
- The registerOutParamter() is generally used to bind the JDBC data type to the data type which the Stored Procedure is expected to return.
The relationship between these three statements is,
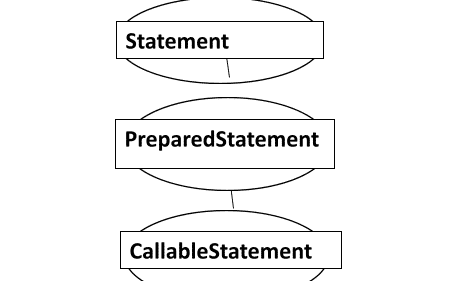
The above three statements are part of the java.sql package.
Note: Ensure proper clean-up of the resources if you are using the Java versions below 7. After version 7, Java try with resources block ensures that the resources opened are automatically closed when not used.
If you found this JDBC Tutorial helpful and wish to learn more such concepts, you can check out our various free online courses available on Great Learning Academy.