Excel checkboxes may seem minor, but they can significantly enhance your spreadsheets by adding interactivity and functionality. Whether you are:
- Building A To-Do List
- Managing Tasks
- Creating Dynamic Reports
- Tracking Project Progress
Checkboxes make your data easier to interact with and interpret. In this guide, we'll walk you through the step-by-step process of
- Adding
- Inserting
- Removing checkboxes in Excel
Helping you streamline your workflow and make your spreadsheets more user-friendly and visually organized.
Learn Excel the smart way! Our course teaches you all the essential tools and techniques to master spreadsheets, from formulas to charts, and improve your workflow in every task you do.
What Are Checkboxes and Why Use Them in Excel?
Checkboxes in Excel are interactive elements that allow users to select or deselect an option with a simple click. They are often used in:
- Task Lists
- Data Input Forms
- Dashboards
- Conditional Formatting Workflows
Here’s why checkboxes are applicable in Excel:
- Task Tracking
Easily mark completed items in to-do lists or project plans. - Data Filtering
Use checkboxes to filter or display data dynamically. - Conditional Formatting
Trigger changes in formatting or calculations based on checked/unchecked status. - User Input Forms
Build interactive forms where users can choose options intuitively.
Form Controls vs. New Cell-Based Checkboxes in Excel (Comparison Table)
| Feature | Form Controls Checkbox | Cell-Based Checkbox (Excel 365) |
| Availability | All modern desktop versions (Excel 2016, 2019, 2021, and Microsoft 365) | Microsoft 365 only (Desktop, Web, and Mobile) |
| Ease of Insertion | Requires the Developer tab and manual placement | Inserted via the Insert tab |
| Linking to Cells | Manually linked to a specific cell | Automatically linked to the cell it's in |
| Formatting/Styling | Limited styling options | Follows cell formatting (font size, color, etc.) |
| Supports VBA | Yes | Limited (primarily formula-based use) |
| Best For | Complex forms, dashboards, and VBA-based automation | To-do lists, checklists, quick tracking |
| Mobile/Web Compatibility | Limited | Fully compatible across platforms |
| Performance on Large Sheets | Slightly slower with too many controls | Lightweight and faster for bulk usage |
Excel for Beginners Free Course
Learn essential Excel skills for data analysis, including functions, formulas, and data visualization techniques. Master cell referencing, sorting, and creating charts and presentations.
Preparing Excel for Checkboxes
Before inserting the "classic" style of checkbox (Form Controls), you may need to complete a one-time setup to make the "Developer" tab visible in your Excel ribbon.
How to Enable the Developer Tab
By default, the Developer tab is hidden. Here's how to enable it:
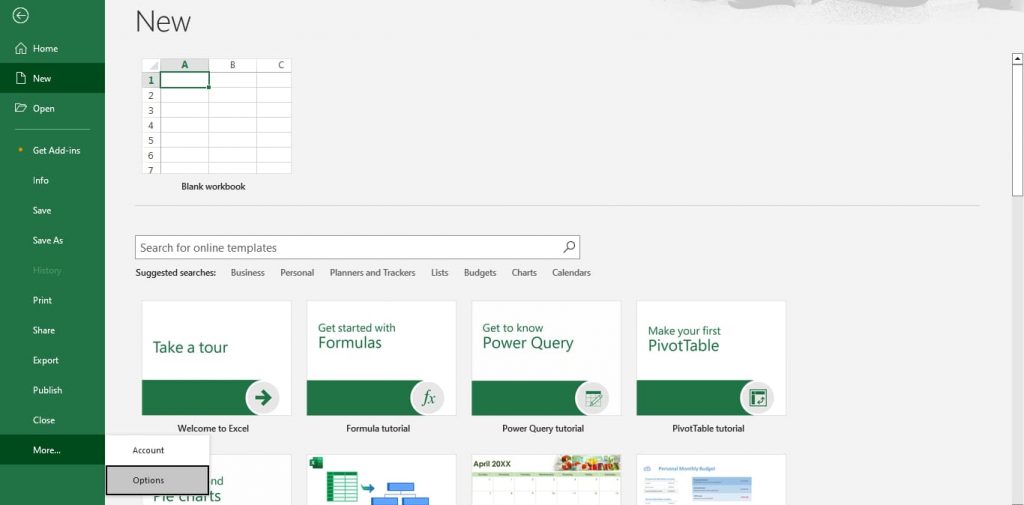
- Open Excel and click on the File tab.
- Choose Options at the bottom.
- In the Excel Options dialog box, click on Customize Ribbon.
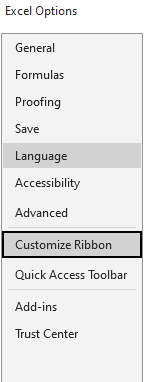
- On the right, check the box labeled Developer under the "Main Tabs" list and click OK.
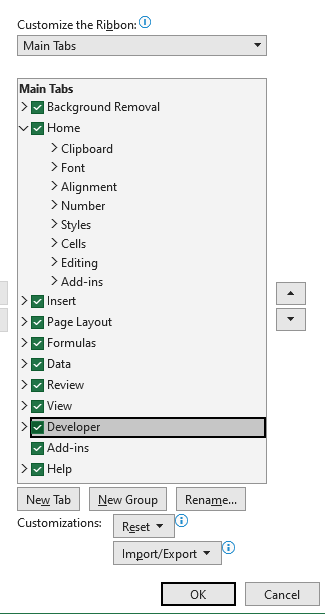
Now, you will see the Developer tab in your Excel ribbon, which you will need for the "Form Controls" method.

Learn Excel for powerful data analysis and enhance your skills for better decision-making.
How to Add or Insert Checkboxes in Excel?
A. Using the New Insert Checkbox Feature (Microsoft 365 Only)
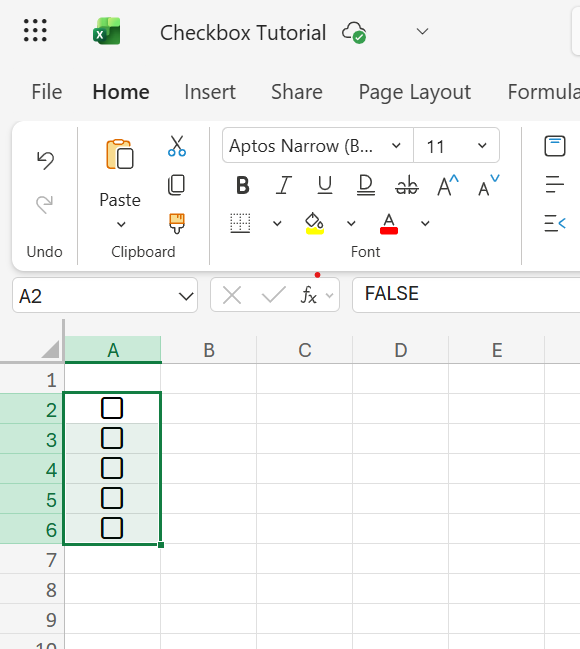
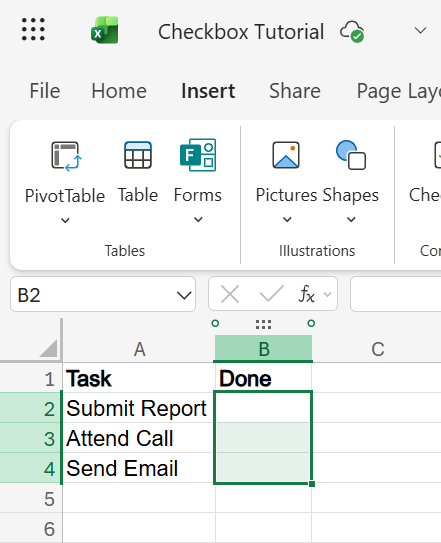
- Select the Cell Range Where You Want Checkboxes:
- Example: Select cells A2 to A6 to create a five-step checklist.
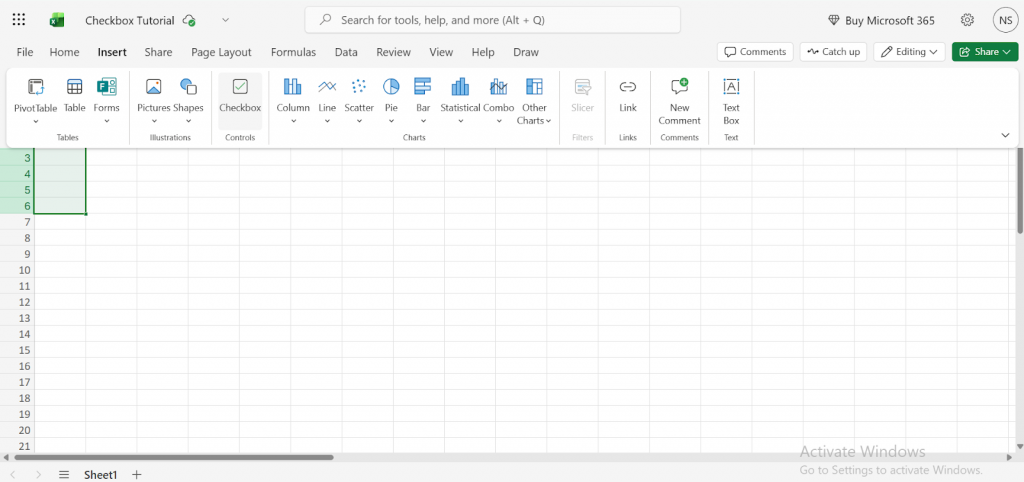
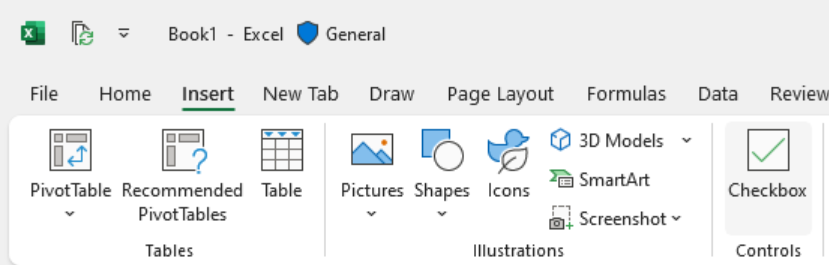
- Go to the Insert Tab:
- Click on the Insert tab on the Ribbon.
- In the Controls group, click on the Checkbox.
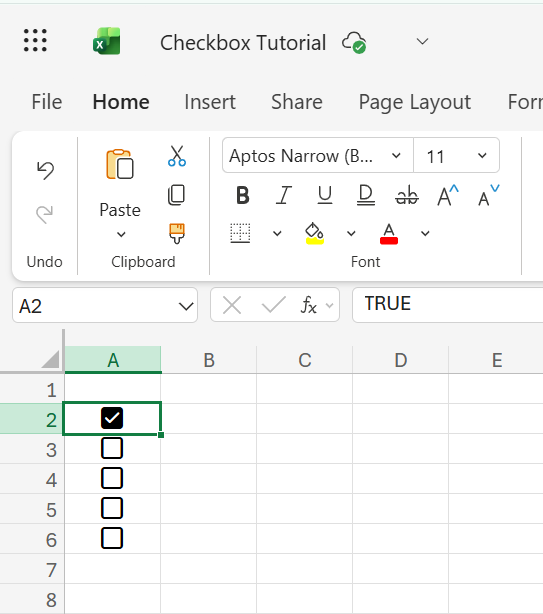
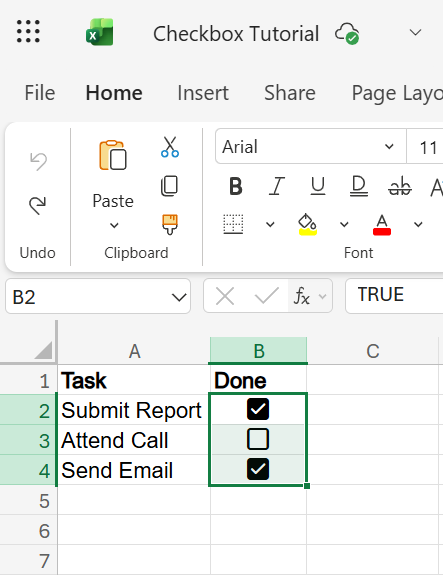
- Checkboxes Are Automatically Inserted:
- Excel adds checkboxes directly inside each selected cell.
- When you click a checkbox, its value changes to TRUE (checked) or FALSE (unchecked).
B. Using Form Controls (Classic Method)
The Form Controls method offers more flexibility and is compatible with older Excel versions. Unlike the new process, checkboxes are floating objects and must be linked manually to cells if you want to use their values in formulas.
Step-by-Step Guide:
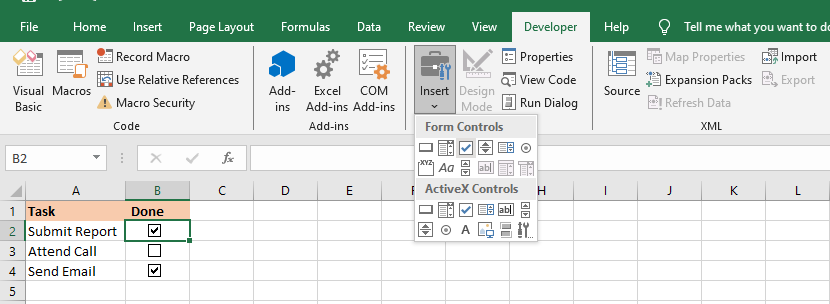
- Insert a Checkbox (Form Control):
- Go to the Developer tab.
- Click Insert, then choose Check Box (Form Control) from the Form Controls section.
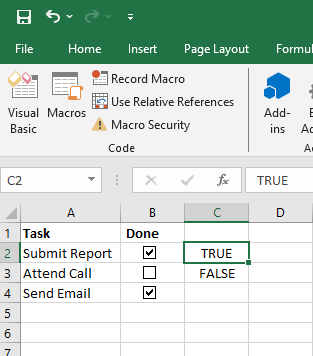
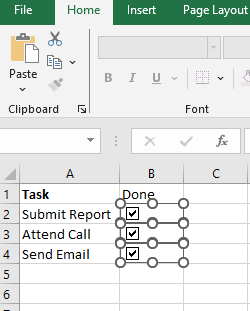
- Click anywhere on the worksheet to insert the checkbox, as we have added it in column B
- Edit or Remove the Default Label:
- Right-click the checkbox > Edit Text to change or delete the default "Check Box 1" label.

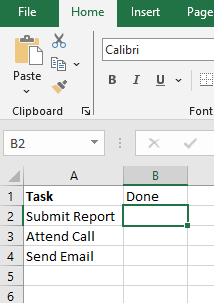
- Link the Checkbox to a Cell (to Retrieve TRUE/FALSE):
- Right-click the checkbox > Format Control.
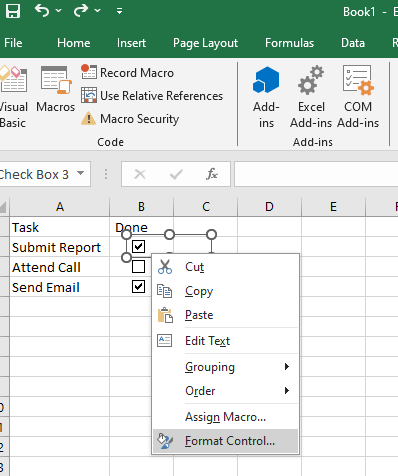
- Go to the Control tab and set a Cell Link (e.g., C2).
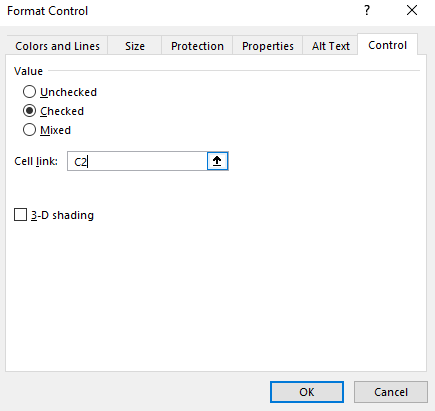
- Now, the linked cell shows TRUE when checked and FALSE when unchecked.
Want to automate actions when a checkbox is clicked?
Excel for Beginners Free Course
Learn essential Excel skills for data analysis, including functions, formulas, and data visualization techniques. Master cell referencing, sorting, and creating charts and presentations.
How to Remove Checkboxes in Excel?
Before you begin, you must know which type of checkbox you are removing, as the method is different:
- Form Controls are floating objects. Deleting the cell behind them will not remove the checkbox.
- Cell-based checkboxes (the new M365 method) are inside the cell. Deleting the cell's content also deletes the checkbox.
If you're unsure of the checkbox type, try selecting it. Form Controls can be moved freely; cell-based ones cannot.
Now, let’s look at the methods for removing them
A. Removing Individual Checkboxes
Use when you want to delete one checkbox at a time.
Steps:
- Right-click the checkbox to select it.
- Press the Delete key on your keyboard or right-click and select Cut to remove it.

B. Removing Multiple Checkboxes
Use this to clean up a range or group of checkboxes quickly.
Option 1: Ctrl + Click Method
- Hold down the Ctrl key.

- Click on each checkbox you want to delete and press the Delete button on your keyboard.
Option 2: Using the Selection Pane
- Go to Home > Editing > Find and Select > Selection Pane.

- A list of all objects (e.g., "Check Box 1", "Check Box 2") appears.
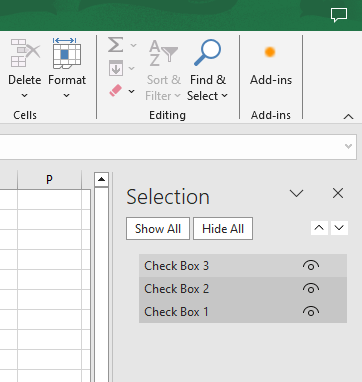
- Use Ctrl or Shift to select multiple items.
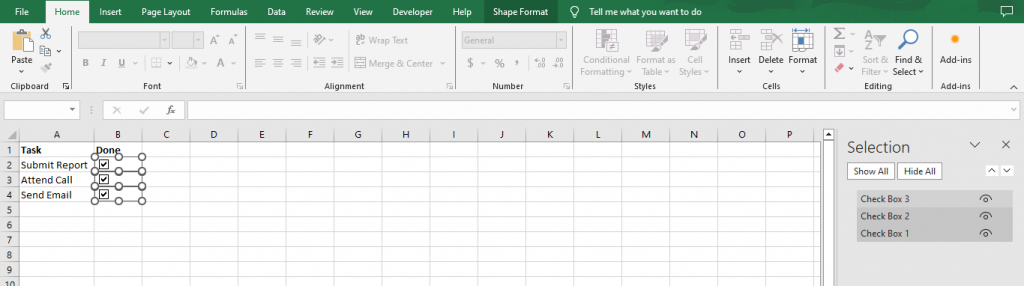
4. Press Delete
C. Removing All Checkboxes at Once (Form Controls)
Best for worksheets with many checkboxes, removes all in one go.
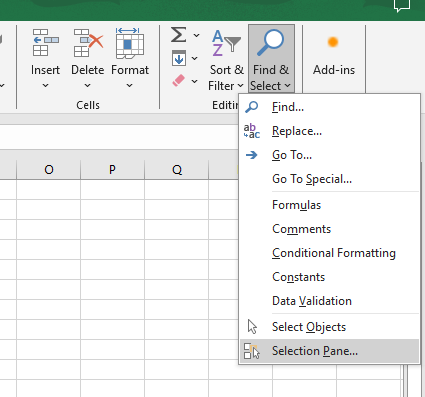
Option 1: Using "Go To Special"
- Go to Home > Editing > Find and Select > Go To Special.
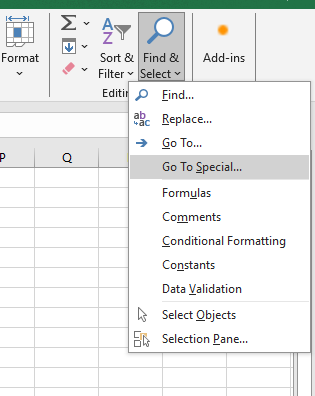
- Select Objects, then click OK.
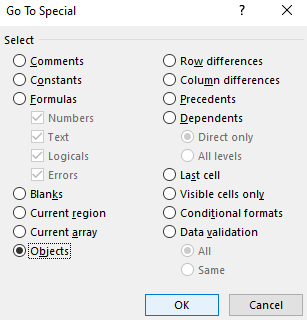
- All objects (checkboxes, shapes, images) get selected.
- Press Delete to remove them.
Caution: This deletes all objects, not just checkboxes.
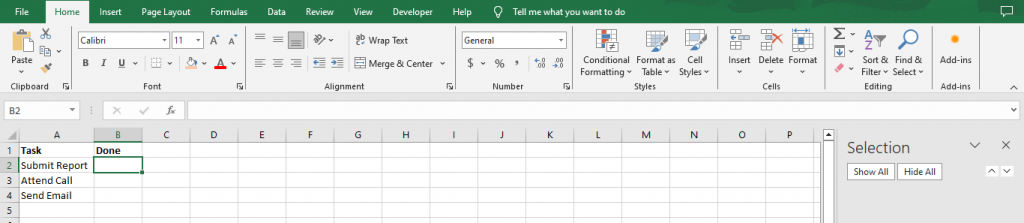
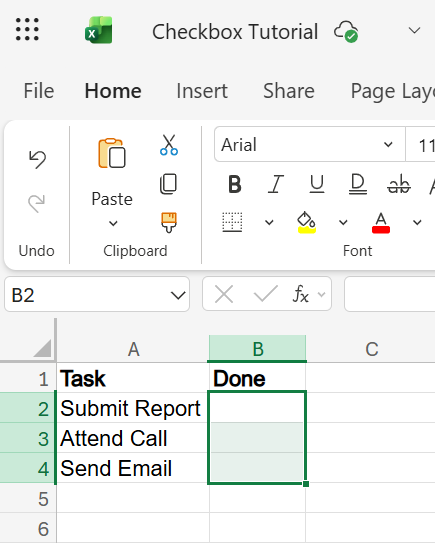
D. Removing Cell-Based Checkboxes (New Insert Method)
If you used the new checkbox feature (available in Microsoft 365 only)
Steps:
1. Select the range that contains the checkboxes.
2. Pressing Delete removes both the checkbox and the TRUE/FALSE value.
Tips and Best Practices for Using Checkboxes in Excel
1. Keep a Clean Layout
- Align checkboxes properly with the help of Snap to Grid:
- Page Layout → Align → Snap to Grid.
- Use consistent cell spacing and hide extra borders or labels for a cleaner look.
3. Group Checkboxes Logically
- If you're creating a form or checklist, use group-related checkboxes with borders or background colors for better readability.
4. Avoid Overlapping Elements
- Don't place checkboxes over formulas or input cells unless intentionally done. It may confuse users or affect data entry.
5. Name Checkboxes Meaningfully (Optional but Helpful)
- If you're using Form Controls, rename checkboxes via the Selection Pane:
- Home → Find and Select → Selection Pane → Double-click to rename.
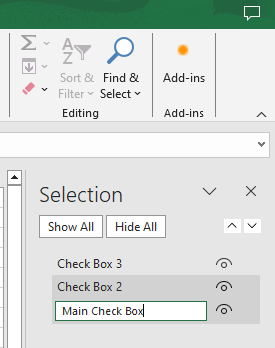
- It helps identify checkboxes in formulas or VBA.
6. Use Conditional Formatting with Linked Cells
- Highlight tasks or rows dynamically:
- E.g., if linked cell = TRUE, turn row green.
- Conditional formatting formula: =$A1=TRUE
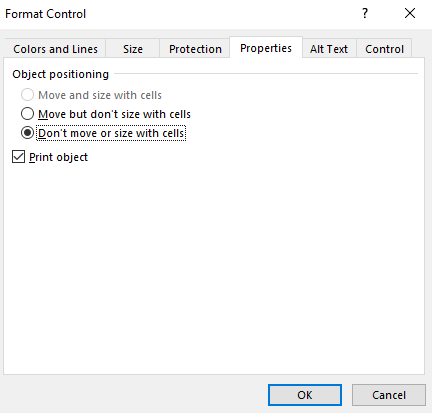
7. Disable Checkbox Movement with Cells (Optional)
- Prevent checkboxes from shifting during sorting or row deletion:
- Right-click checkbox → Format Control → Properties tab → Select “Don’t move or size with cells.”
Conclusion
Checkboxes in Excel are potent tools for easily creating interactive dashboards, task trackers, and data-driven forms.
As you master such features and dive deeper into data organization and automation, strengthening your Excel & analytical skills becomes crucial.
Great Learning’s Data Science and Analytics program empowers you with industry-relevant tools, from Excel and SQL to Python and Machine Learning, preparing you for a successful career in the data-driven world.