- What Are Macros in Excel?
- Common Uses for Macros in Excel
- Methods to Enable Macros in Excel
- Additional Macro Security Settings
- Enabling the Developer Tab for Advanced Macro Management
- Features Available on the Developer Tab
- Why Enable the Developer Tab?
- Why Are Macros Disabled by Default?
- Tips & Best Practices for Using Macros Safely
- Conclusion
Do you recall the time when you had to perform the same Excel tasks?
Copy, paste, format, and do it all over again. It must have been tormenting.
But macros are here to save the day.
Think of macros as your personal Excel assistant. You perform the whole process one time, and Excel records all your operations, thus letting you bring back the complete flow with just one click.
Suddenly, a monotonous activity that occupied your time for around 30 minutes is completed in merely 15 seconds. You are now able to devote your time to the main concern of data interpretation and better decision-making.
In this tutorial, we will take you step by step through turning on the Excel macros feature and using them to win back those hours you’ve been spending on tedious work.
What Are Macros in Excel?
Macros in Excel are powerful scripts that automate repetitive tasks to save time and reduce manual errors.
They are created either by recording your actions or by writing code directly in Visual Basic for Applications (VBA) to reduce the potential for manual error by allowing you to execute complex or repeated actions with a single command, such as a:
- A button click
- A keyboard shortcut
- Automatically, when the workbook opens
With macros, you can automate a vast range of tasks in Excel, including:
- Entering Data
- Arranging Cells
- Calculating Values
- Analyzing Reports
Learn Excel the smart way! Our course teaches you all the essential tools and techniques to master spreadsheets, from formulas to charts, and improve your workflow in every task you do.
Common Uses for Macros in Excel
- Task Automation
From formatting data to generating reports, macros save you time and effort by automating the tasks you perform regularly. - Data Transformation
Macros can clean, transform, and prepare data for analysis without manually handling each row. - Custom Reports
Create customized reports and dashboards based on your required specific conditions, without manually filtering or manipulating the data. - Simplifying Complex Processes
Automate calculations or multi-step processes, like running a series of complex formulas in one go. - User Interaction
Can be set to prompt users for input (like dates or numbers) and execute actions based on that input.
Methods to Enable Macros in Excel
A. Enabling Macros for a Single Workbook
1. Enable Using the Message Bar:
This is the quickest and most common way to enable macros for a specific file you trust.
- Step 1: Open the macro-enabled workbook. These files typically have a .xlsm extension to distinguish them from regular .xlsx files.
- Step 2: Look for the yellow Security Warning bar (also known as the Message Bar) at the top of the sheet, just below the ribbon.
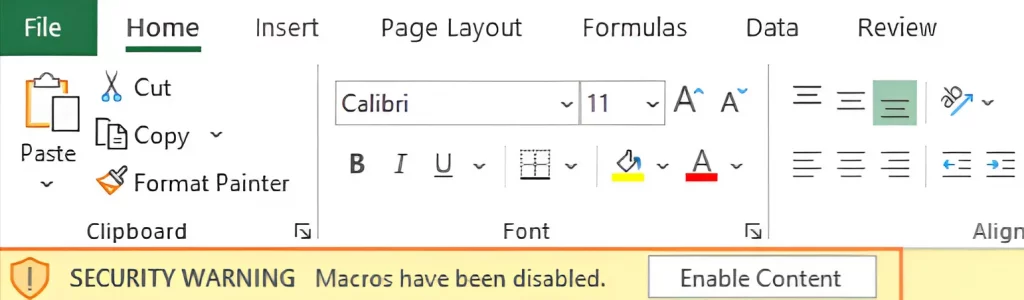
- Step 3: Click the “Enable Content” button.
A single click of this button will add the file to your list of Trusted Documents.
Excel then adds the file to a list of 'Trusted Documents,' so you won't see the security warning again as long as the file hasn't been moved or renamed.
Important
This trust applies to your profile on this computer. In case you forward the file to a colleague or open it on another PC, the security warning will come up.
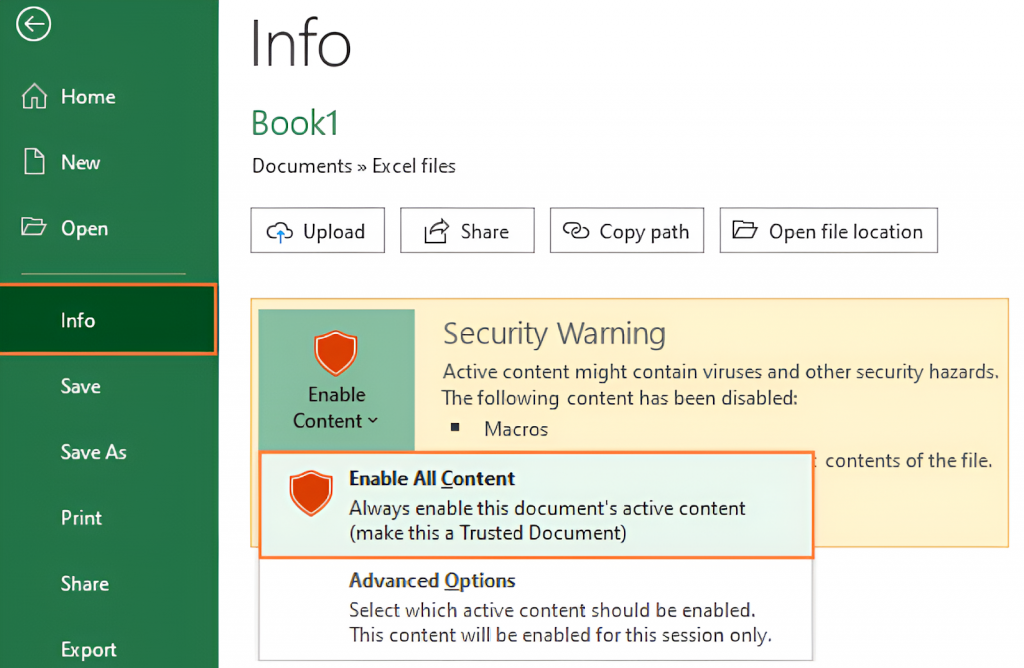
2. Enable Using the Backstage View:
This is an alternative way to enable macros if you miss the message bar.
- Step 1: Open the workbook with macros.
- Step 2: Click the File tab to access the "Backstage View", Microsoft's full-screen menu, where you'll find options like Print, Save, and Info.
- Step 3: Select Info. You will see a Security Warning section highlighted in yellow.
- Step 4: Click the “Enable Content” drop-down menu.
- Step 5: Choose “Enable All Content”.
B. Enabling Macros for All Workbooks (Trust Center Settings)
Use this when you frequently use macro-enabled files from trusted sources.
Steps:
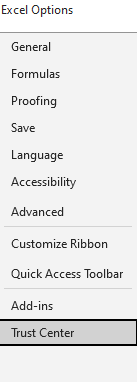
- Open Excel and go to File > Options.

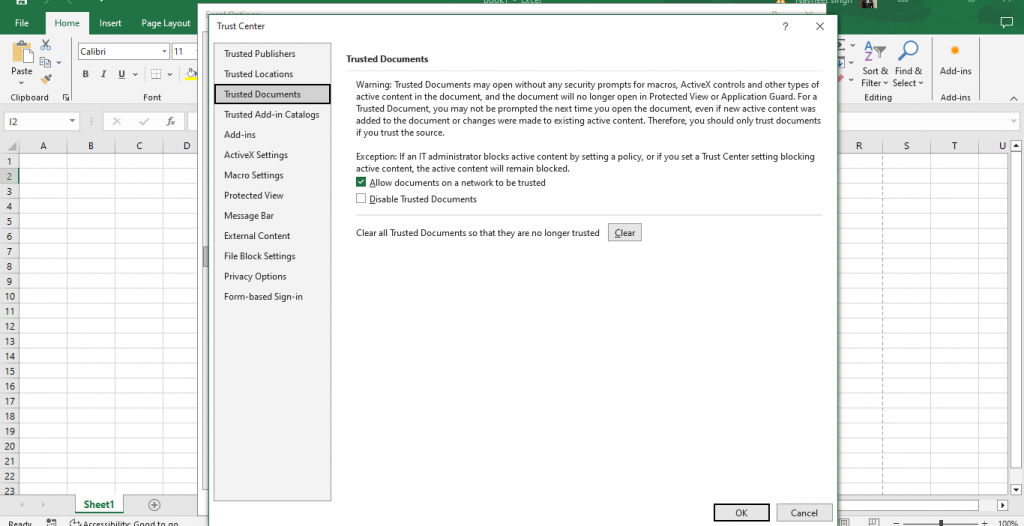
- Click on Trust Center (bottom-left pane).
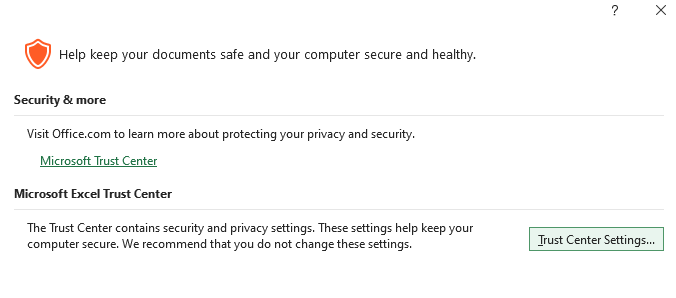
- Click Trust Center Settings (button on the right).
- In the Trust Center, go to Macro Settings.
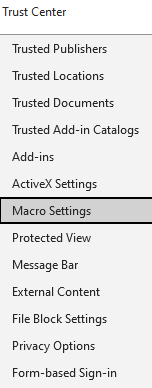
Here, you’ll see four options:
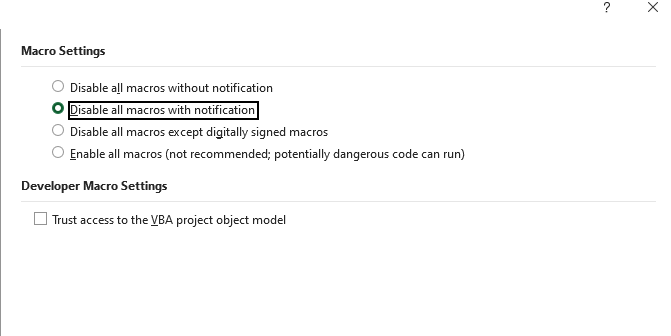
| Option | Description |
| Disable all macros without notification | Macros are blocked silently, and no warning is shown. |
| Disable all macros with notification (Default) | Shows a security warning and lets you choose whether to enable it. |
| Disable all macros except digitally signed macros | Only macros with trusted digital signatures are allowed. |
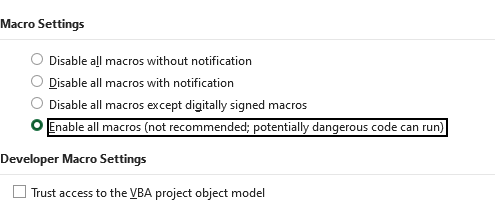
| Enable all macros (not recommended) | All macros are enabled by default—use with extreme caution. |
Caution:
Enabling all macros globally can be dangerous, as it may run malicious code automatically. Only use this setting if you fully trust all files you open.
Summary Tips:
- For one-time use: Stick with the default “Disable all macros with notification” and enable content on a per-file basis.

- For recurring individual files: Make them “Trusted Documents” by enabling their content once. This avoids future warnings for those specific files.
- For entire folders of safe files: Use “Trusted Locations” to enable macros automatically for any file stored within them.

- Global setting: Avoid selecting “Enable all macros” unless you are in a highly secure and controlled environment.
Excel for Beginners Free Course
Learn essential Excel skills for data analysis, including functions, formulas, and data visualization techniques. Master cell referencing, sorting, and creating charts and presentations.
Additional Macro Security Settings
1. Trusted Locations: How to Use Them for Safer Macro Execution
Trusted Locations are folders on your computer or network that you designate as safe.
Excel automatically enables macros in files stored in these locations without showing security warnings.
Remember, making a file a "Trusted Document" means it's trusted, regardless of its location. A "Trusted Location," on the other hand, trusts any file you place within that specific folder.
Why use Trusted Locations?
- They reduce the number of macro security prompts for files you know are safe.
- Help maintain security by restricting auto-enabled macros to files in trusted folders only.
How to add a Trusted Location:
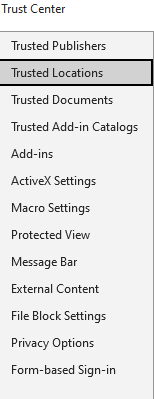
- Go to File > Options > Trust Center > Trust Center Settings.
- Click Trusted Locations on the left panel.
- Click Add new location
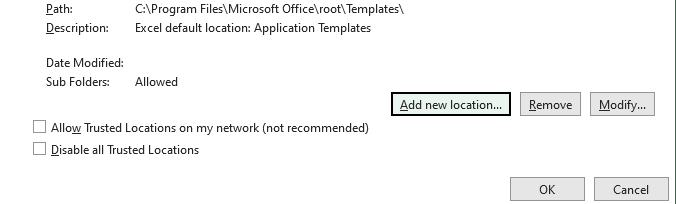
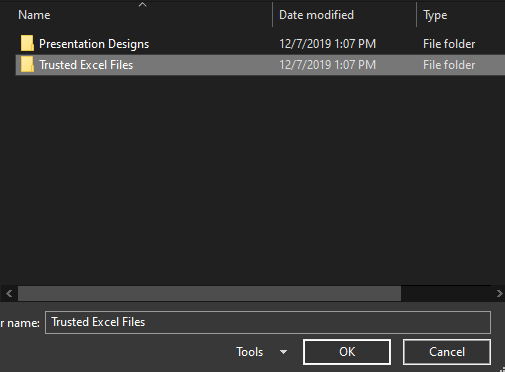
- Browse and select the folder where you keep trusted Excel files.
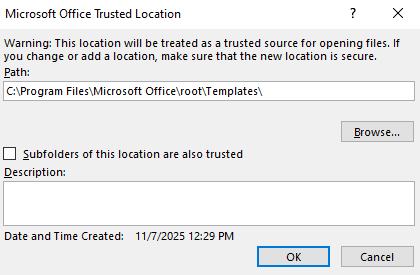
- Optionally check “Subfolders of this location are also trusted” and click OK to confirm.
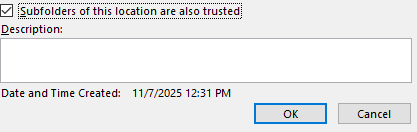
From now on, any macro-enabled workbook saved in this folder will open with macros enabled automatically.
2. Digitally Signed Macros: What They Are & When to Use This Option
Digitally signed macros use a digital certificate to verify the macro’s source and integrity.
- A digital signature ensures the macro comes from a trusted publisher and hasn’t been tampered with.
- Macros signed by trusted certificates can be enabled without warnings (depending on your settings).
When to use:
- Choose “Disable all macros except digitally signed macros” in Macro Settings for enhanced security.
- Useful in corporate environments where macros are signed by the IT department or trusted developers.
- Protects users from malicious or altered macros.
3. Trust Access to the VBA Project Object Model: What It Means
This setting controls whether Excel allows programmatic access to the VBA environment itself.
- VBA macros can dynamically create or modify others by accessing the VBA project object model.
- Trust access to the VBA project object model enables or restricts this behavior.
Why it matters:
- Enabling this option allows macros to manipulate VBA code, which is a powerful but potentially risky programming feature.
- This is disabled by default to prevent malicious macros from altering your VBA code behind the scenes.
- Enable it only if you run trusted macros that require programmatic code changes, such as automated macro generators or complex development tools.
Enabling the Developer Tab for Advanced Macro Management
The Developer tab is your command center for creating, editing, and managing macros in Excel. Although it is not required to merely run macros in a file you have been sent, it is necessary when you:
- Want to record your own automations
- Write or view Visual Basic for Applications (VBA) code
- Add interactive controls, like buttons, to your worksheets
How to Show the Developer Tab in Excel?
Follow these simple steps to enable the Developer tab:
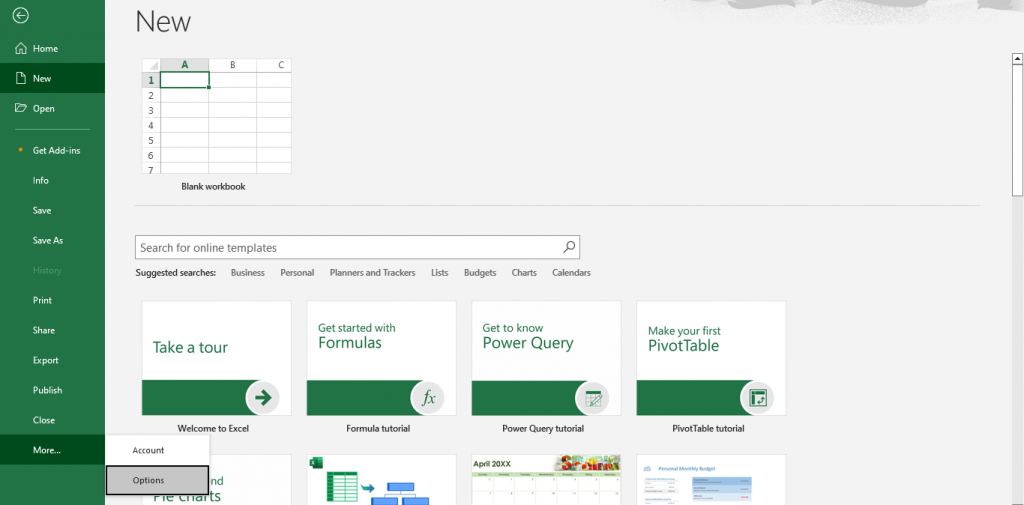
- Open Excel and click on the File tab at the top left.
- Click Options at the bottom of the left sidebar to open the Excel Options window.
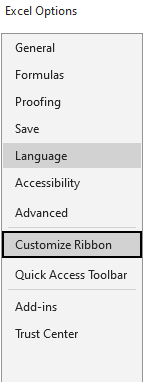
- In the Excel Options dialog, select Customize Ribbon from the left pane.
- On the right side, under Main Tabs, locate and select the Developer box and click OK to save your changes.
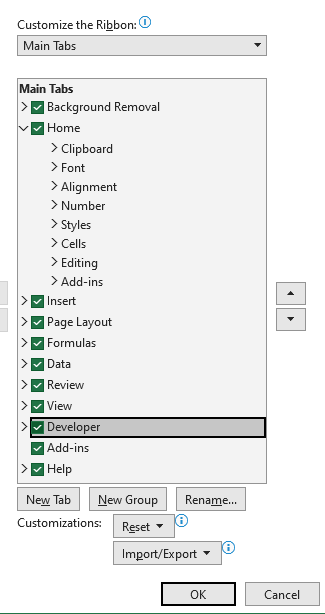
The Developer tab will appear on the Excel ribbon, usually between the View and Help tabs.

Features Available on the Developer Tab
Once enabled, the Developer tab provides powerful tools for macro and VBA management:
| Feature | Description |
| Record Macro | Easily record a series of actions to create a macro without writing VBA code manually. |
| Visual Basic Editor (VBE) | It opens the VBA editor, where you can directly write, edit, and debug VBA code. |
| Macros | View, run, edit, or delete existing macros. |
| Macro Security | A convenient shortcut that opens the Trust Center's Macro Settings pane, allowing you to control how Excel handles all macros. |
| Add-Ins | Manage Excel add-ins that extend functionality, some of which may include macros. |
| Controls (Form Controls and ActiveX Controls) | Insert interactive elements like buttons, checkboxes, and combo boxes for enhanced user forms and dashboards. |
| XML Tools | Work with XML data and schemas (advanced feature). |
Why Enable the Developer Tab?
- To record and edit macros to automate repetitive tasks.
- To write and debug VBA code for custom Excel solutions.
- To control macro security settings and manage trusted documents.
- To insert form controls and ActiveX controls for interactive spreadsheets.
Why Are Macros Disabled by Default?
VBA macros have the capability to carry out numerous activities not only on your Excel workbook but also on your file system on your computer.
Due to this fact, they can be utilized to implement malevolent code. Learning this risk will enable you to make more secure choices regarding the time when you may enable macros in the Excel workbooks you access.
Key Reasons:
- Security Threats:
- Malicious macros can delete files, steal data, or install malware (e.g., ransomware).
- Hackers often embed harmful macros in Excel files and distribute them via email or downloads.
- File Origin Risks:
- Files downloaded from the internet or received via email are especially risky.
- Excel disables macros in such files until they are explicitly enabled by the user.
- User Control:
- Disabling macros by default allows users to enable them only when they trust the source.
- Data Integrity:
- Prevents unauthorized or unintended changes to data or formulas caused by background scripts.
Tips & Best Practices for Using Macros Safely
1. Only Enable Macros from Trusted Sources
- You must always practice caution when using macros. It is safer to leave macros disabled for workbooks from unverified sources.
When you get a file through email or the internet, don’t allow macros to run freely before checking it. Ensure you use trusted sources or digitally signed macros to lower your risk.
- Use Trusted Locations or digitally signed macros to reduce risks.
2. Keep Macro Security Settings at Default or Higher
- Excel’s default setting, Disable all macros with notification, strikes a good balance between usability and security.
- Avoid enabling “Enable all macros” globally unless necessary.
- Regularly review and adjust your macro security settings via File > Options > Trust Center.
3. Use Digital Signatures for Your Macros
- If you create macros for your team or organization, sign them with a digital certificate.
- Digitally signed macros help recipients verify authenticity and reduce security warnings.
4. Backup Your Files Regularly
- Always keep backups before running or modifying macros, especially those that modify large datasets or critical information.
- This safeguards against accidental data loss or corruption caused by macro errors.
5. Limit Macro Permissions When Possible
- Avoid enabling “Trust access to the VBA project object model” unless required.
- Restrict macro permissions to prevent unauthorized access or code injection.
6. Keep Your Excel & Antivirus Software Updated
- Microsoft frequently releases security updates addressing macro vulnerabilities.
- Updated antivirus software can help detect malicious macros embedded in files.
7. Educate Yourself & Your Team
- Awareness about macro risks and safe practices reduces the chances of malware infections.
- Train colleagues on how to identify suspicious files and properly enable macros.
Conclusion
Learning macros is a way to automate highly repetitive tasks effortlessly, but the strongest and effective automations are the ones that are created on a firm foundation.
Learning how to organize data properly, how to use sophisticated formulas, learning about PivotTables, and how to handle workbooks is important to have the best use of such features as macros.
In order to establish that essential base and fill in all the blanks, whether they be the rudimentary functions or the techniques used by the professionals, our full course is geared towards that. Advance your skills by enrolling in the Microsoft Excel Course and become an actual master of it.